Changing the SyAM System Area Manager Web Port
Changing the SyAM System Area Manager Web Port
By default, the SyAM System Area Manager interface is accessible by browsing to the server on port 3930. This tool tip shows how to configure System Area Manager to use another available port.
- On the Start menu of the server running System Area Manager, navigate to Administrative Tools – Services.
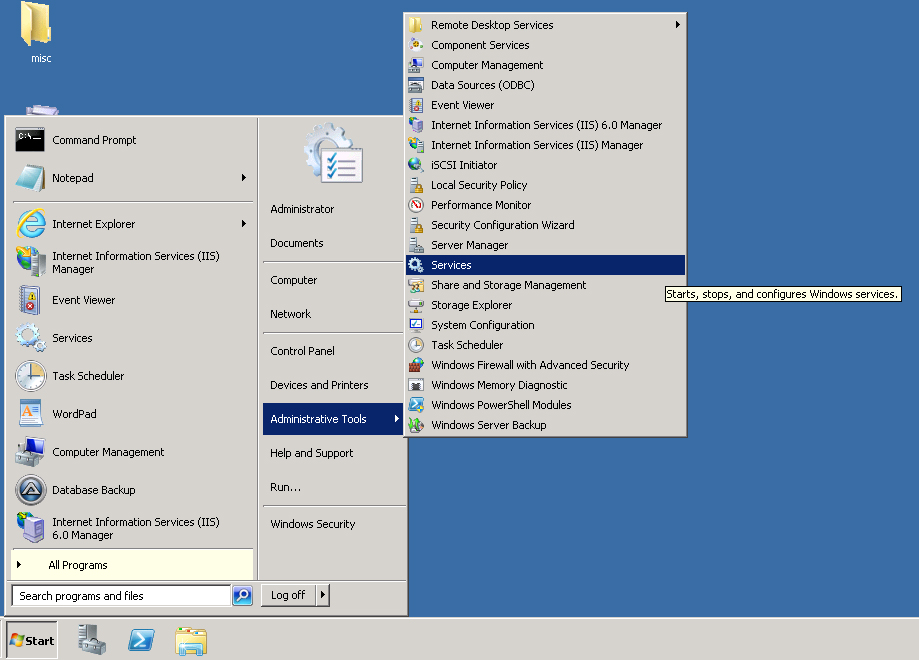
- Select the service named SyAM Software System Area Manager Central Manager. Click Stop to stop the service.

- Select the service named SyAM Software System Area Manager Web Server. Click Stop to stop the service.
- In the System Area Manager installation directory (by default, C:\SyAM) navigate to Jetty\etc and edit the file syam.xml.
- Find both instances of 3930 and replace them with your preferred available port.
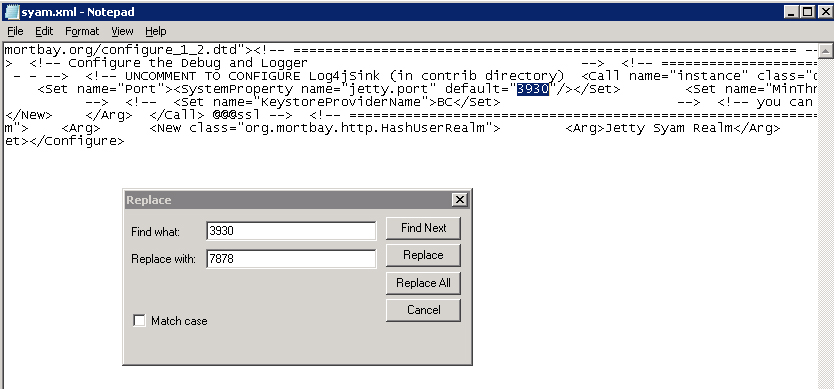
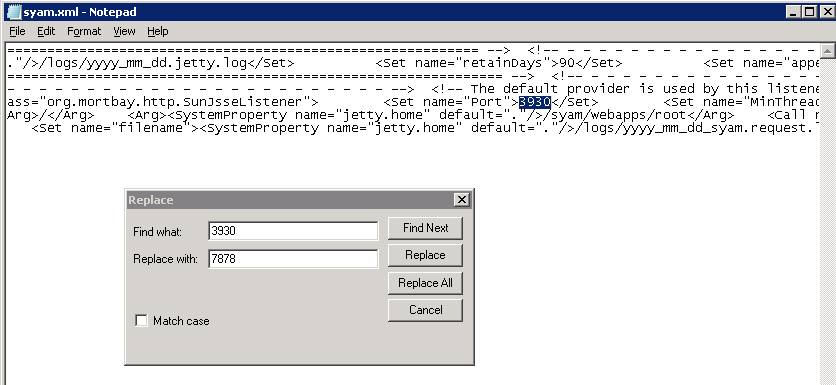
- Save the file.
- Return to Services. Select SyAM Software System Area Manager Central Manager, then click Start to start the service. Do the same to start SyAM Software System Area Manager Web Server. Close the window when the services have started.
You should now be able to browse to System Area Manager on your chosen port.