Deploying Microsoft Office 2016 - Non UAC Enabled Targets
Deploying Microsoft Office 2016 – Non UAC Enabled Targets
SyAM Management Utilities can be used for silent deployment of Microsoft Office 2016 to client systems that do not have User Access Control (UAC) enabled.
Requirements: Office 2016 installation media must be for a volume-licensed edition. The installation disk will contain a folder named Admin. If it does not, the installation media is for a retail edition of Office, which is not supported by this procedure. Windows target systems must have the SyAM System Client installed and reporting to SyAM System Area Manager. Target systems must be discovered by Management Utility. The location defined in Management Utility as the Default Application Path must have sufficient disk space for the Office installation files.
Create a subdirectory of the default application directory for the Office installation files. In our example, we have created the directory Office_2016. Copy all the files from your Office volume-licensed edition installation media to this subdirectory.
The next step is to create a customization file to be used by the Office installation on client systems. The customization file will specify the license key and the parameters needed for silent, unattended installation. On a Windows system with access to the shared network directory, use the Run command to start Office 2016 setup with the /admin parameter.
If a security warning appears, click the Run button to confirm that you wish to run the application. The Microsoft Office Customization Tool will start. Click OK to create a new customization file.
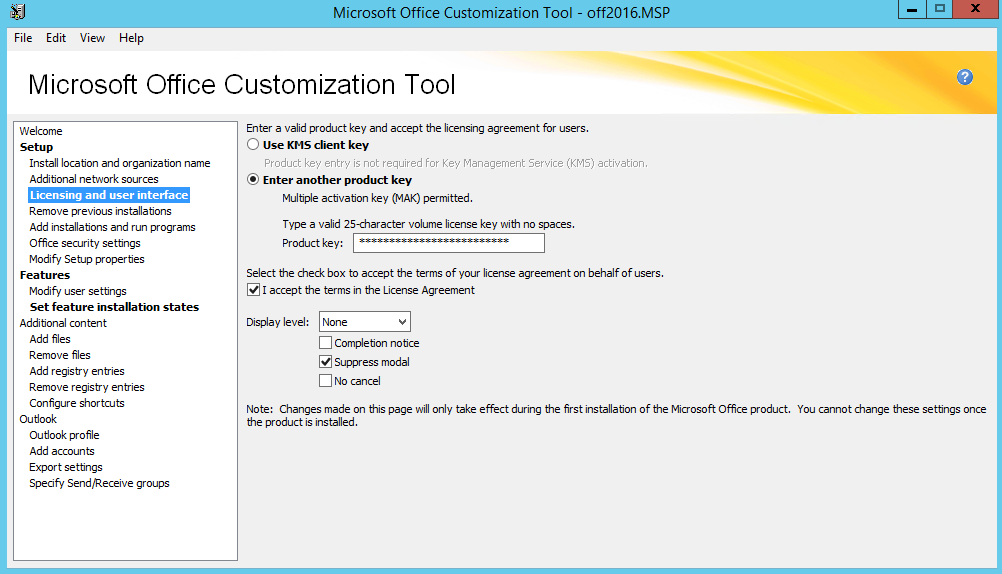
In the left-hand menu, choose Setup – Licensing and user interface.
- To enter your product key, click the Enter another product key radio button, then type a valid 25-character volume license key in the entry box.
- Check the box to accept Microsoft’s license terms on behalf of the user.
- Using the drop down menu, set Display level to None for silent installation.
- Check the box for the Suppress modal option.
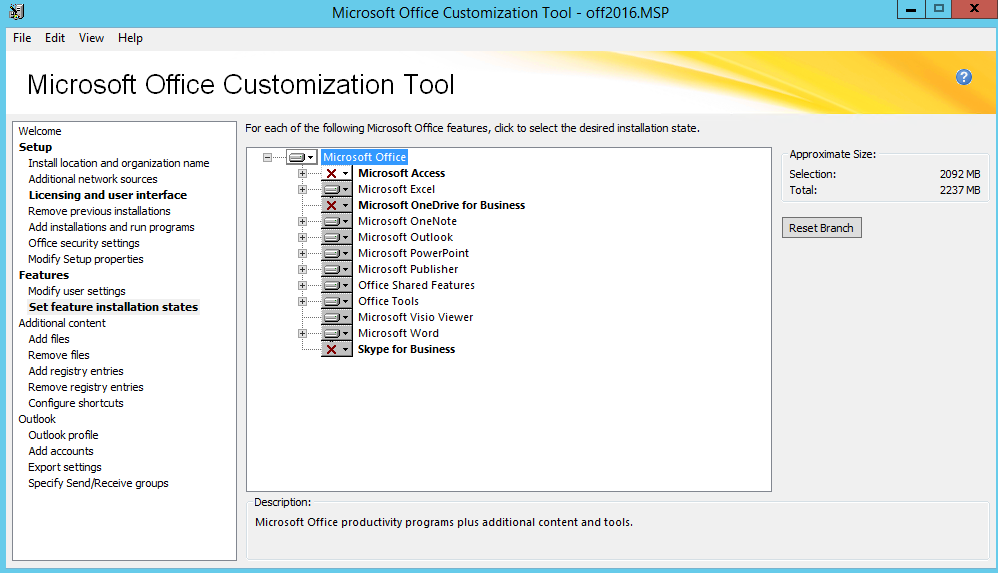
Other settings may be modified at this time; consult Microsoft documentation for further information. If upgrading it is recommended to remove prior installations.
When finished, save the configuration file in the product installation subdirectory. In our example, the configuration file office2013.MSP is saved in the Office2013 folder in our default application directory.
In Management Utility, create a Third Party template. Enter a template name. Choose Windows as the target platform and select the correct authentication template. Enter the path to the network share containing the installation subdirectory; this will already be present if the default path has been entered in Administration Settings. Click the Find Files button and choose the Office installation subdirectory from the drop down menu. Click the Find Files button again, and choose setup.exe from the drop down menu.
Enter the parameters to specify the customization file:
/adminfile off2016.MSP
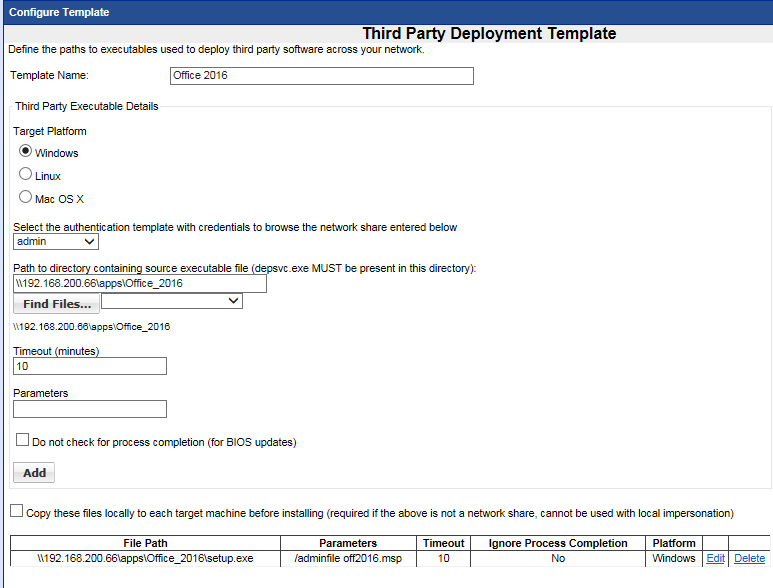
When the parameters have been entered, click the Add button. Review the file path and parameters. Click the Save Changes button. Click OK to confirm.
Please note the following, if your Office installation includes 64-bit support:
- Running setup.exe from the root of the installation directory (as we have specified in our instructions) will install 32-bit Office on either a 32-bit or 64-bit system. The exception is that if a 64-bit version of Office is already installed, the upgrade will be 64-bit.
- Running setup.exe from the x86 directory will install 32-bit Office; running setup.exe from the x64 directory will install 64-bit Office on a supported OS. You should create your custom configuration file in the appropriate subdirectory, and specify that subdirectory when creating the Third Party software installation template in Management Utility.
- For information on the features of 32-bit vs. 64-bit Office, and how to choose which to install, please consult Microsoft documentation.