Deploying Lightspeed User Agent
Deploying Lightspeed User Agent
The Third Party Software Deployment feature of SyAM Management Utilities can be used to perform a silent deployment of Lightspeed Systems User Agent to Windows machines.
Requirements: Obtain the correct installation file from Lightspeed Systems. This installation procedure will suppress any reboot called for by the installation, so the product may not be completely installed until after the next system restart. In our example we use the 64-bit installation; the same procedure can be used for the 32-bit version.
Create a batch file to perform the installation using msiexec.
@ECHO OFF
c:
cd \
msiexec /qn /i \\192.168.100.158\apps\UserAgentx64.msi ID_SERVER=<HOSTNAME OF ROCKET> REBOOT=ReallySuppress
exit
Please note that the line beginning with the msiexec command is a single line that ends with the parameter REBOOT=ReallySuppress. In your batch script, this line must not contain line breaks.
In your batch file, substitute your Default Application Path and the hostname of your Lightspeed Systems Rocket. In a multi-appliance network, the hostname of the Parent Rocket should be used. Lightspeed Systems offers a tool for customizing the MSI to include your Rocket server. If you use this method, the batch script msiexec command should not include the ID_SERVER parameter:
msiexec /qn /i \\192.168.100.158\apps\UserAgentx64.msi REBOOT=ReallySuppress
Save the batch file (in our example, we’ll call it lightspeed.bat) then copy both the batch file and the installation .msi file to the directory that is specified by the Default Application Path on the Administration Settings page of Management Utility.
In Management Utility, create a Third Party template. Enter a template name. Choose Windows as the target platform and select the correct authentication template. Enter the path to the network share containing the batch file and installation .msi file; this path will already be present if the default path has been entered in Administration Settings. Click the Find Files button and choose the batch file from the drop down menu.
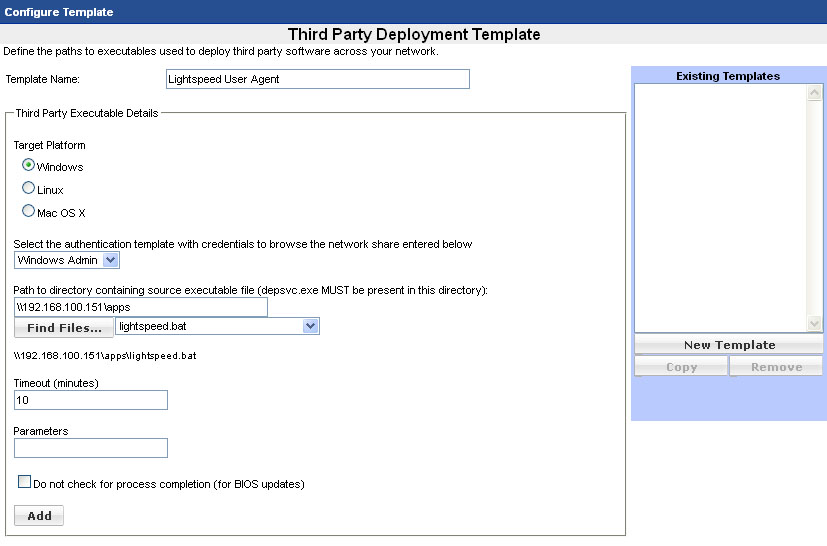
Click the Add button.
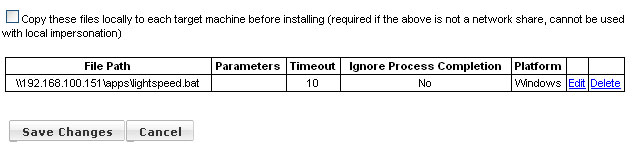
Click the Save Changes button. Click OK to confirm.
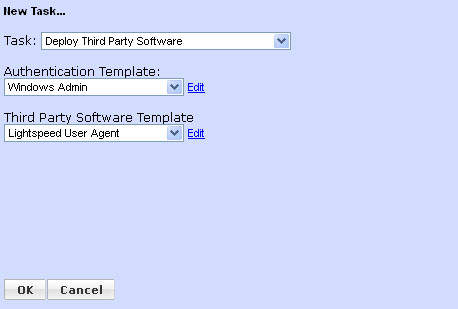
Now you can test deployment to a single system. Select a system in the Groups area. Click the system row, then right-click to display the context menu. From the menu, choose Deploy Third Party Software.

In the New Task box, choose the Windows authentication template and the newly created Lightspeed User Agent deployment template. Click OK.
On the Add/Edit a Job page, click the Run Job button, then click OK to confirm. The installation will begin shortly.
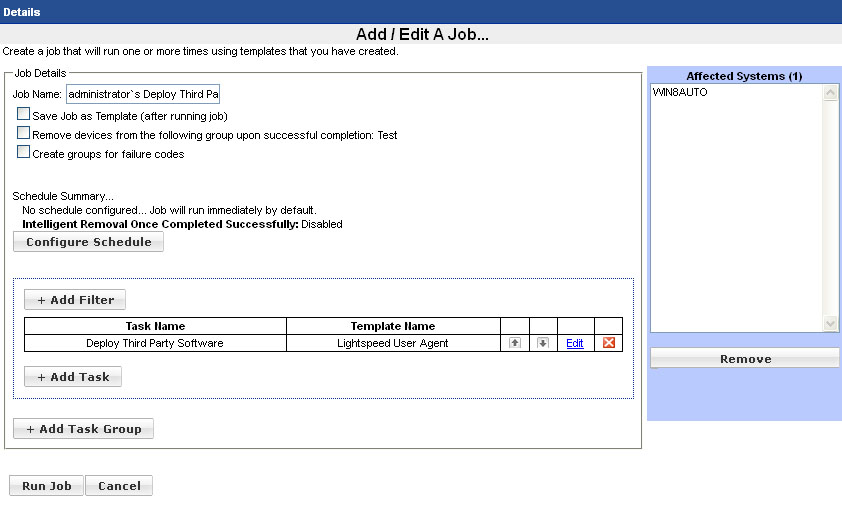
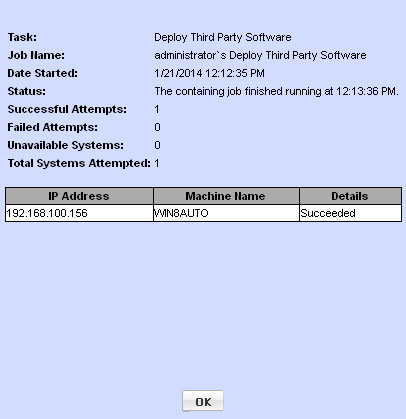
After the job is finished, you may review the status by finding the job in the Status area and clicking the View Details link.
Once you have deployed successfully to a single machine, you can use the Groups context menu options to deploy the application to multiple client machines. Deployment jobs can be configured to run on a regular schedule by clicking the Configure Schedule button on the Add/Edit A Job page.
When performing Third Party software deployment with Management Utilities, we encounter a limitation when using a batch file as we do in this procedure. Success is reported when the batch file is run on the target machine, but we can’t be sure that the software was properly installed. We can use SyAM System Area Manager to report the software applications that are installed on individual machines or groups of machines. There will be some delay as the list of installed applications will be updated on the next scheduled synchronization of the System Client and System Area Manager.
In System Area Manager, use the drop down menu at upper right to navigate to the Report page. Choose the report type Application Summary. Click the Generate HTML button.

The report will be displayed in a popup window.
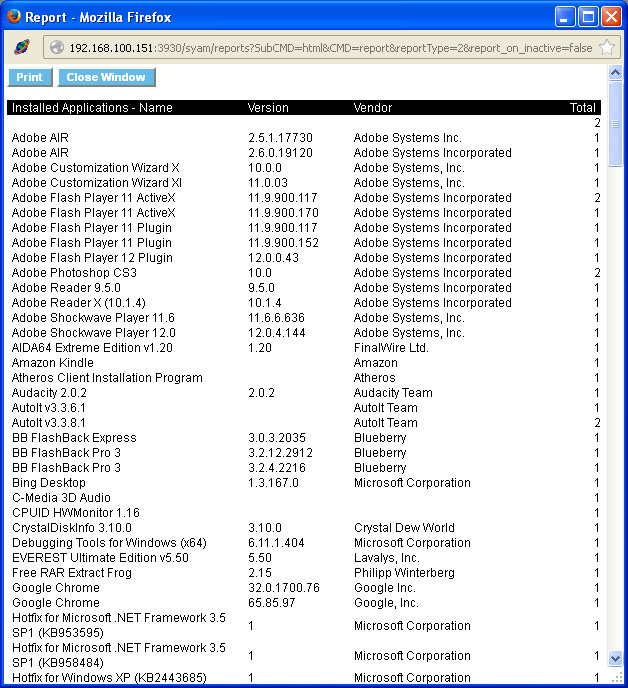
Scroll down to view the Lightspeed Systems User Agent in the list of installed applications.
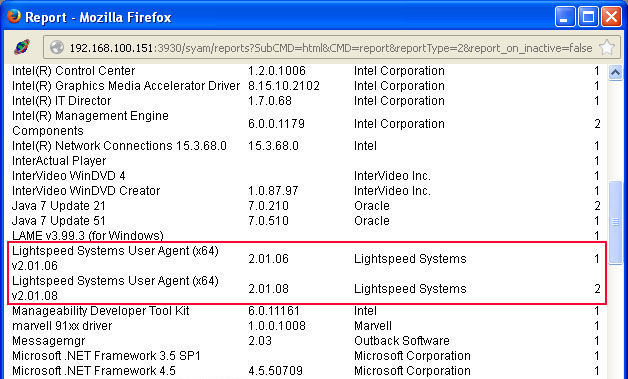
Here, the Application Summary report shows that we have one system with User Agent 2.01.06, and two systems with version 2.01.08.
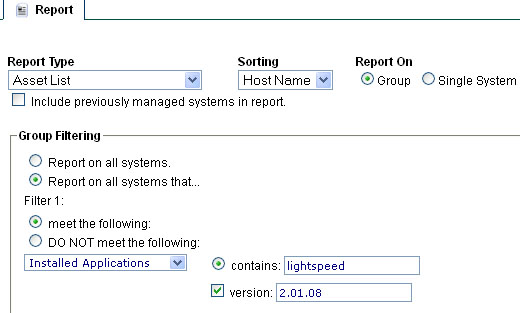
The Asset List report can be used to produce a list of machines where the software is installed or not installed. A particular version can be specified. For example, we’ll choose Asset List from the Report Type menu, and we’ll report on the entire group. Enable filtering by clicking “Report on all systems that…” and then under Filter 1, click “meet the following” to set the sense of the filter. In the Filter 1 menu we’ll choose Installed Applications. In the Contains box we’ll type in “lightspeed” (the search is case-insensitive) and we’ll check the version box and specify the latest version.
Click the Generate HTML button to produce the report.
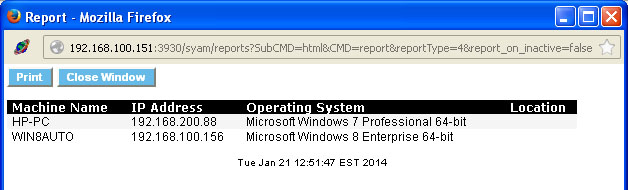
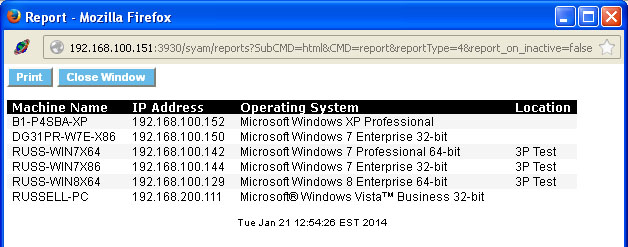
This report shows the two systems that have the latest version installed. We can also produce a report of all systems in our group where no version of the application is installed. This time, we’ll enable the filter once again by clicking “Report on all systems that…” but we’ll change the sense of the filter by clicking “DO NOT meet the following.” Again we choose Installed Applications from the drop down menu, we enter “lightspeed” in the contains box, but we won’t specify a version.
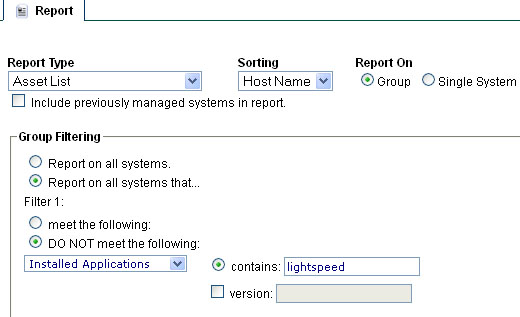
The report shows any systems in our group where the application is not installed.
By setting up a regularly scheduled job in Management Utilities to perform application deployment, target systems that may not be available at a particular time will be retried on the next scheduled run. You can then use System Area Manager reporting to show the progress of deployment. Any systems where deployment is not successful after some number of attempts can be identified, and problems preventing deployment can be resolved on the individual systems.