RAID Management
SyAM System Client – Server and Desktop performs integrated monitoring of PCI RAID Controllers. All discovered PCI RAID Controllers that we support will be monitored, and their summary configuration and status displayed under "Managed RAID Controllers" within the Storage tab.
SyAM System Client – Server and Desktop will discover RAID Controllers that it can manage only if the required RAID drivers are installed. If a new RAID Controller is installed after SyAM System Client – Server and Desktop has been started, then restart the system for it to discover the new Managed RAID Controller.
Please check the release Notes for the list of RAID Controller compatibility for the version of software you are using.
Managed PCI RAID controllers can be configured with SyAM System Area Manager - Server. Navigation begins from the Storage Details tab.
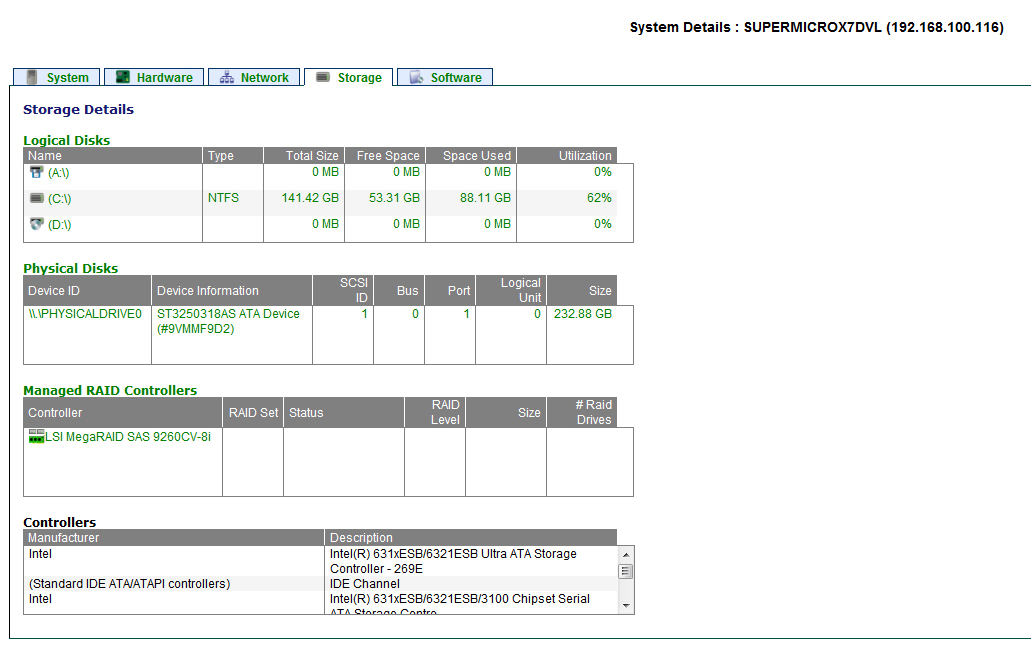
Click on the RAID Controller to open up the RAID Controller window.
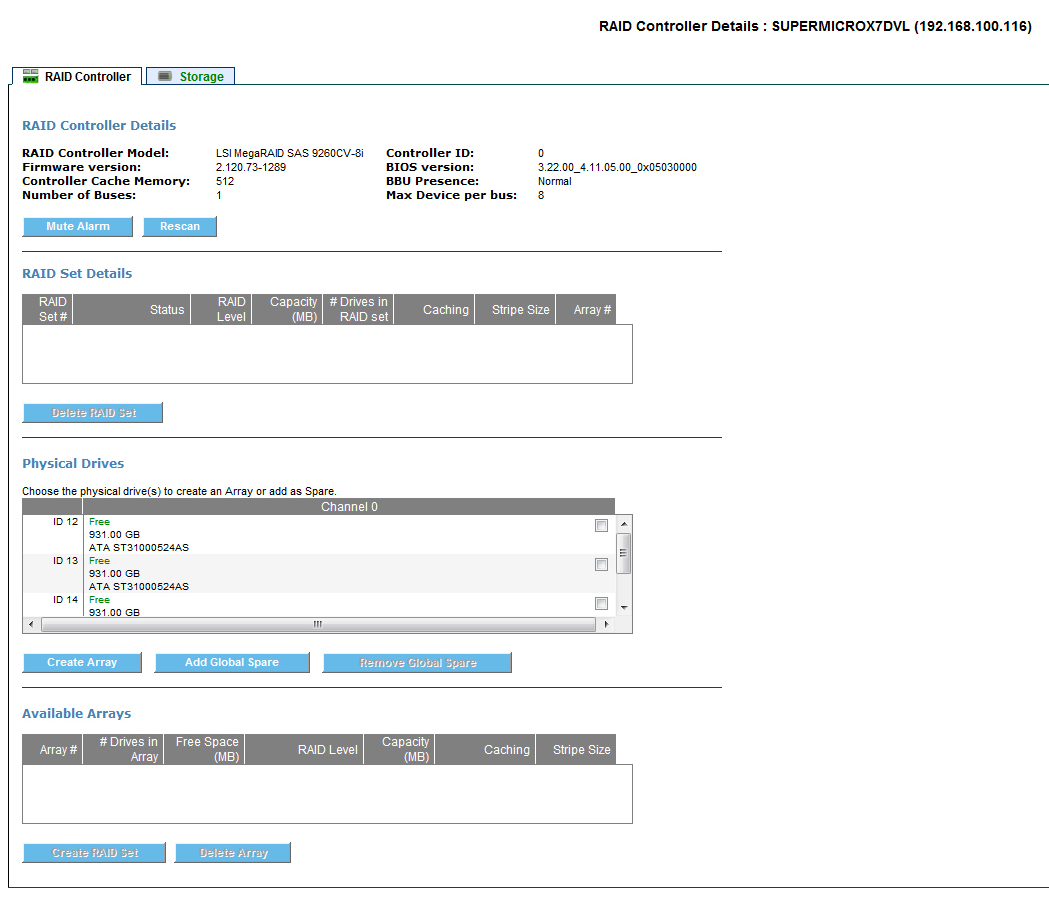
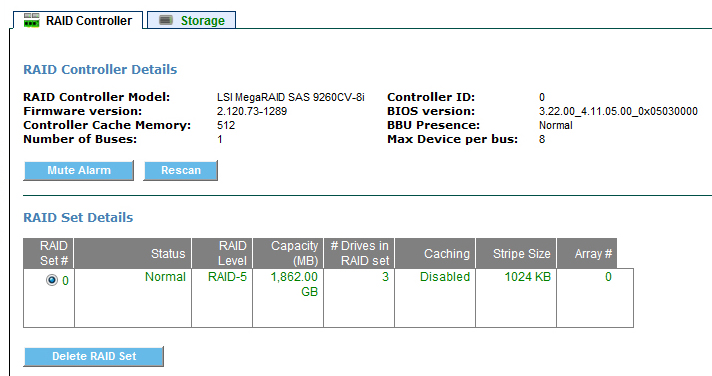
- RAID Controller Details Screen
The RAID Controller screen is divided into 4 parts.
RAID Controller Details – Displays the controller model, firmware version, Cache if present, Number of Bus, ID, BIOS Version, BBU Presence and Max Devices per Buses
RAID Set Details - Displays the current RAID sets configured on this controller, including their description, RAID Set #, and Status (Normal, Init, Rebuild, Degraded, Failed). A RAID Set (also called a RAID Array) appears to the operating system as a physical disk.
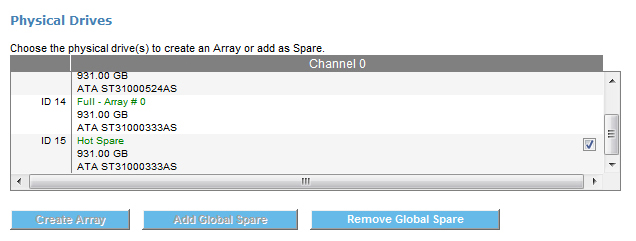
Physical Drives – Displays the physical drives connected to the RAID controller, including their location on the BUS, ID, Status, Capacity, Vendor and Model. Physical drives in use by a RAID controller are typically not visible to the operating system.
Available Arrays – Displays the physical arrays defined by the RAID controller. A physical array is a grouping of drives on which RAID Sets are created. The display includes the RAID levels and capacities available for creating additional RAID sets.
- Steps in Creating a RAID Set
- Decide if you will create a RAID Set on an existing Physical Array, or want to first create a new Physical Array for the RAID Set. If you will use an existing Physical Array proceed to step 4.
- To create a Physical Array, choose the physical drives that you wish to make up the array by clicking on their check box. (Remember only drives not in use in other arrays or as hot spares can be used.)
- Click on the Create Array button – wait for the screen to update

- Now click on the Physical Array that you wish to create the RAID Set on. (Physical Arrays with no available capacity will not display any available RAID Set configurations.)
- Choose the RAID level from the drop down box. Only RAID levels supported for the particular set of drives in the Physical Array will be presented. The maximum capacity available for the selected RAID level is calculated and displayed. You may enter a lower capacity to be used for this RAID Set.
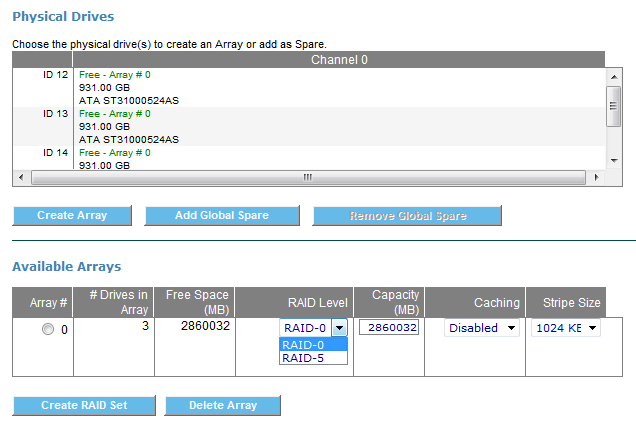
- Next choose the Caching policy and stripe size from the drop down boxes.
- Click the Create RAID Set button to create the RAID Set.
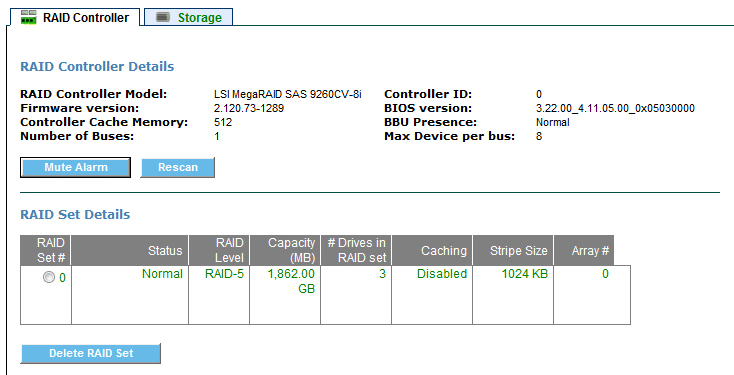
- The system will now process your configuration and will create the RAID Set. If for any reason the create operation fails, a message will be displayed at the top of the screen explaining the cause for failure.
- The new RAID Set will now appear under the RAID Set Details
- If you created a Physical Array in Step 3 and decided not to create a RAID Set on it, you may dismiss it by selecting it and clicking the Delete Array button. You cannot delete Physical Arrays that have RAID Sets created on them.
- Adding/Removing a Global Spare
- Choose the physical drive that you wish to become a global spare to the RAID Set by clicking on its check box, then click on the Add Global Spare button.
- To remove a global spare click on the check box next to the drive that is currently displayed as a hot spare, then click the Remove Global Spare button.
- Deleting a RAID Set
- Under RAID Set Details click the radio button next to the RAID Set to delete. Then click the Delete RAID Set button. Note that when multiple RAID Sets are present on the same Physical Array, only the last RAID Set displays a radio button and may be selected to delete.
SNMP Alerts for External Storage Devices
The System Area Manager can receive events from Infortrend and Dot Hill external storage devices when SNMP alerts are configured on the storage device and the SNMP trap receiver is configured for the IP address of the System Area Manager system.
The System Area Manager will write the event messages to the Windows Application Event Log and the Area Manager Event Log, and can also be configured to send email alerts for the events received. An email alert will be sent if the Platform Event Trap check box is set and the email information is configured.