Windows Firewall Configuration with Group Policy for SyAM System Client Installation
Windows Firewall Configuration with Group Policy for SyAM System Client Installation
SyAM System Client can be deployed to systems on your network using SyAM Management Utilities. If Windows Firewall is enabled on target systems, it may be necessary to configure the firewall to allow discovery and deployment. In an Active Directory environment, Group Policy can be used to perform the firewall configuration. In this document we’ll show how to do this on your Windows Server 2012 R2 domain controller.
Windows Firewall with Advanced Security was introduced in Windows Vista and Windows Server 2008. If your environment includes XP or Server 2003 systems, you will need to create policies to support the older Windows Firewall. We’ll show how to create both policies. For each firewall you can configure exceptions that allow the SyAM System Client installation, or you can use Group Policy to disable the firewall.
In the final section of this document, we’ll show how to apply the policies created by linking them to a domain or Organizational Unit.
Create Group Policy to configure exceptions for Windows Firewall with Advanced Security (Vista / Server 2008 or later)
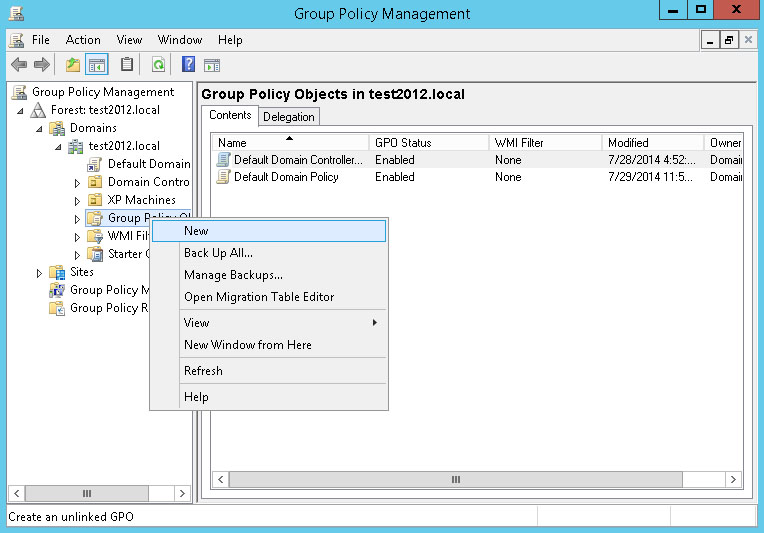
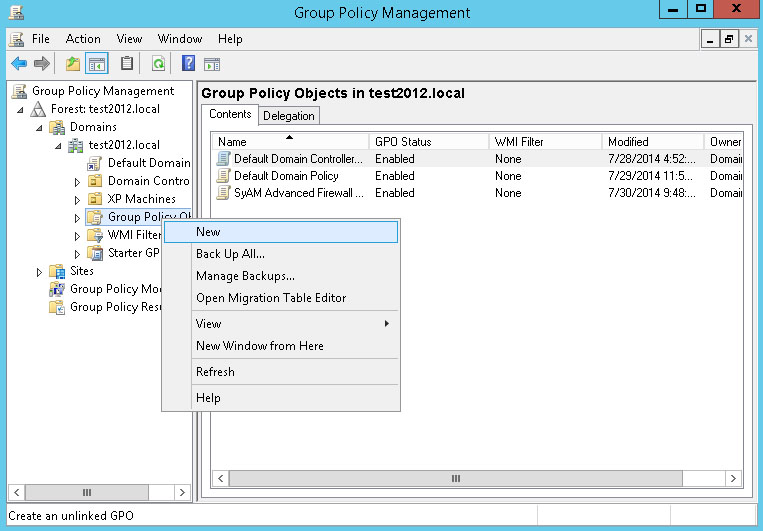
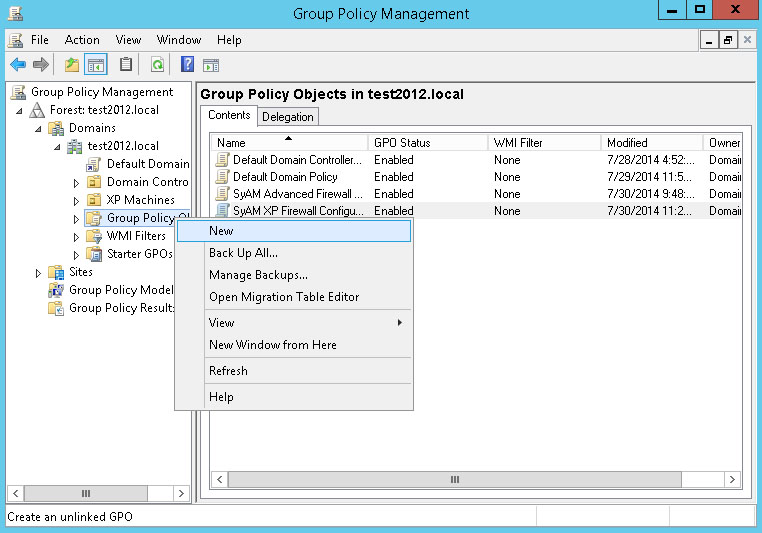
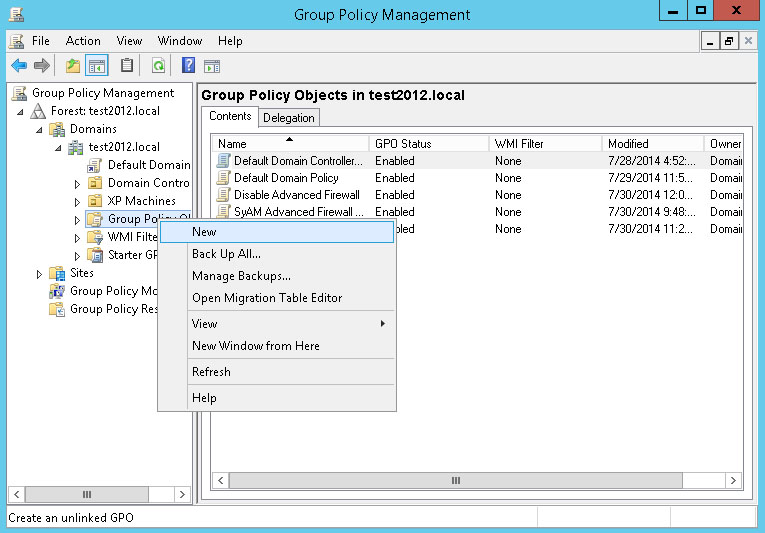
From the Start menu, go to Administrative Tools – Group Policy Management. In the menu under Domains, find the domain to be configured. Under the domain name, right-click Group Policy Objects. From the menu, select New.
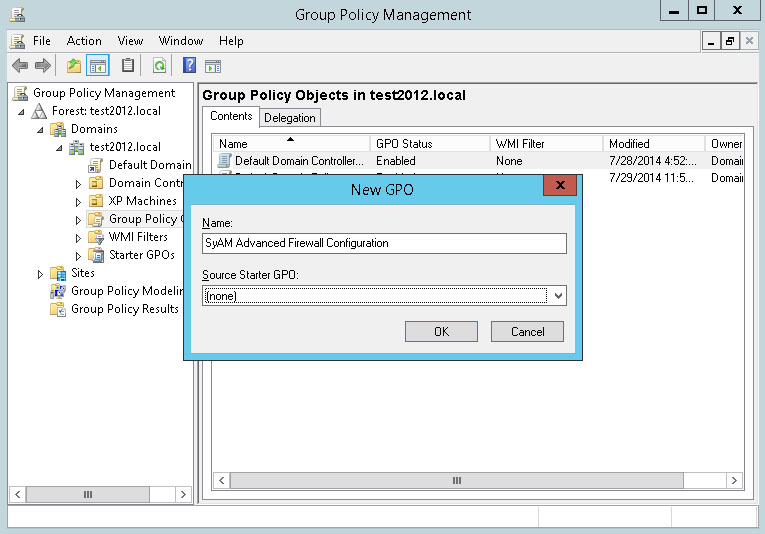
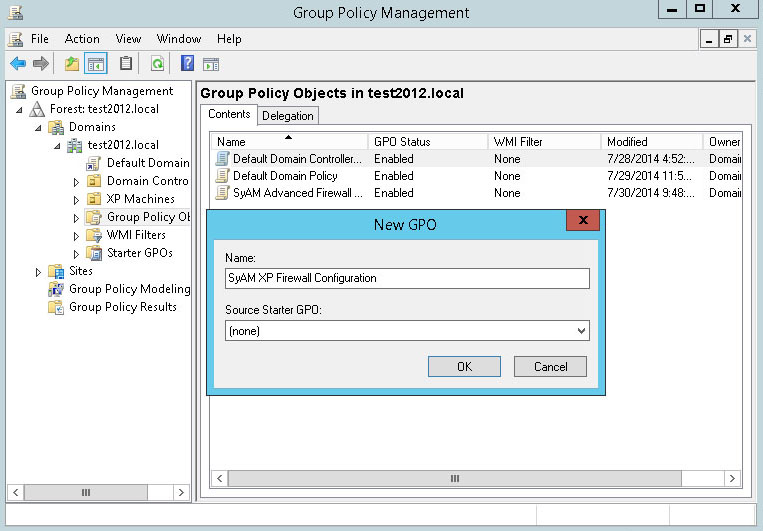
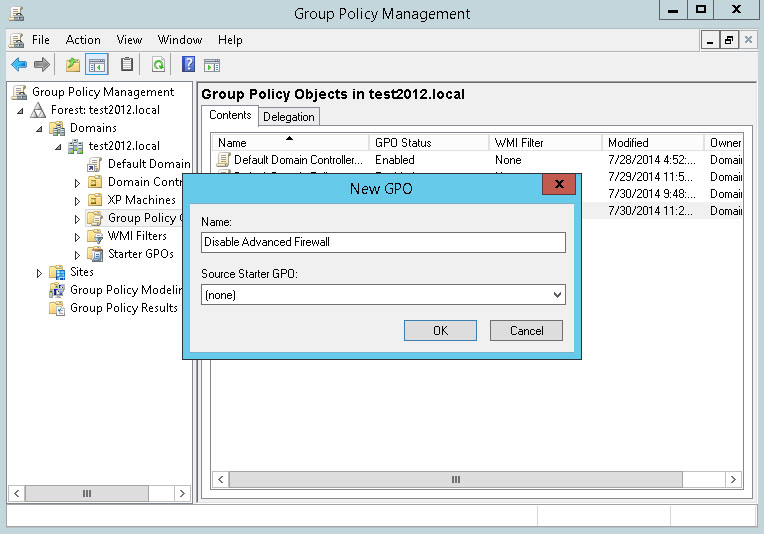
Enter a name for the new Group Policy. Click OK.
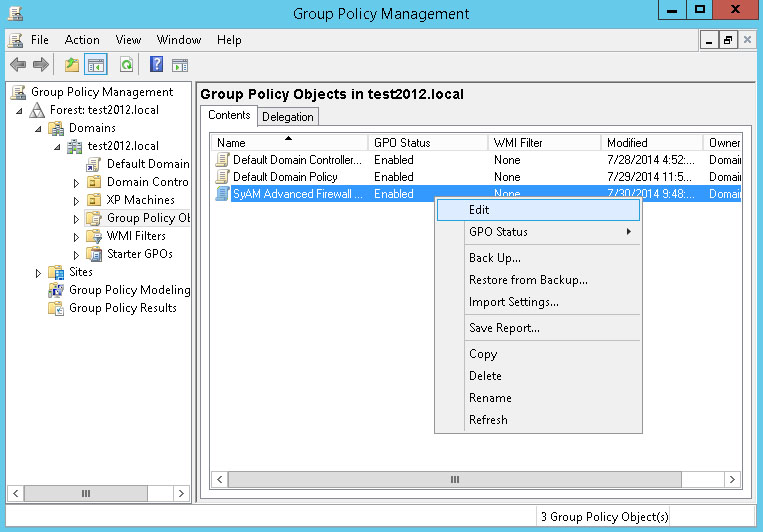
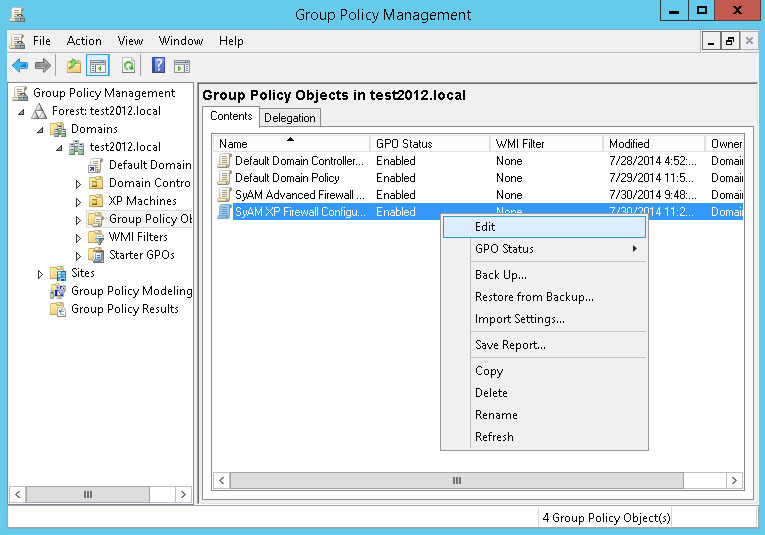
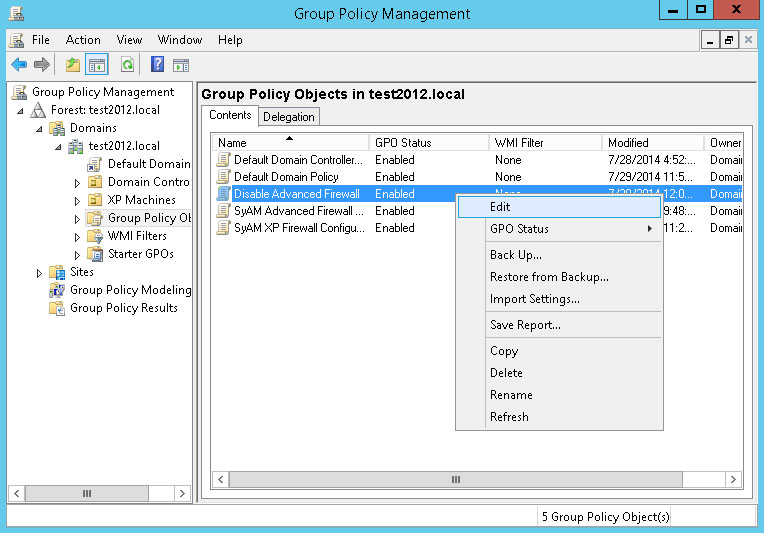
Right-click the new policy and choose Edit from the menu.
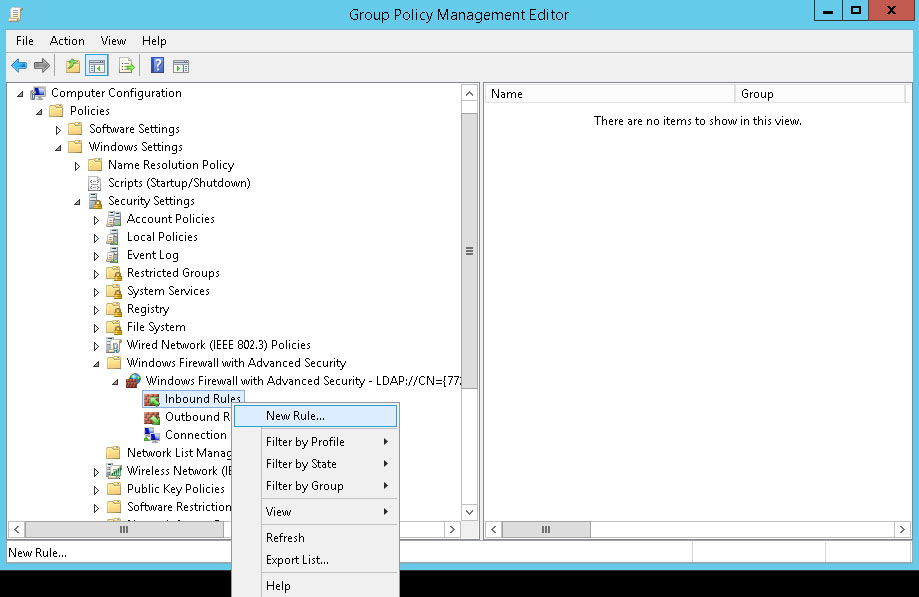
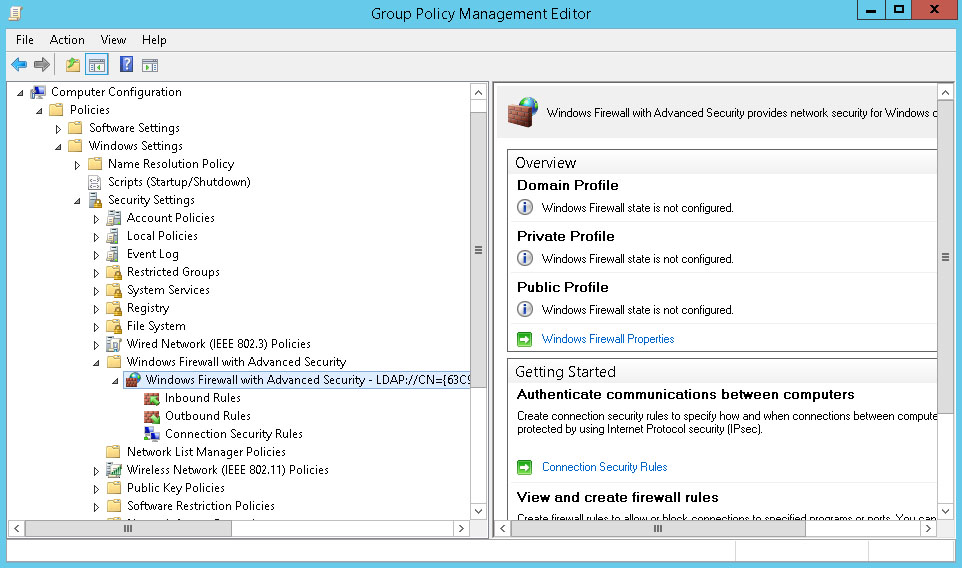
In the Group Policy Management Editor, navigate to Computer Configuration - Policies - Windows Settings - Security Settings - Windows Firewall with Advanced Security, then expand Windows Firewall with Advanced Security - LDAP://cn=... and under this, select Inbound Rules.
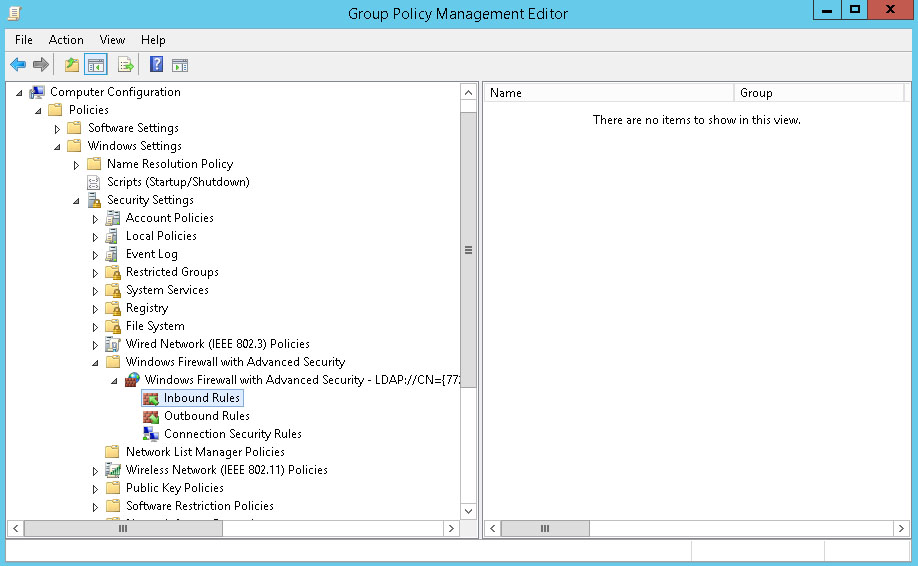
Right-click Inbound Rules and choose New Rule.
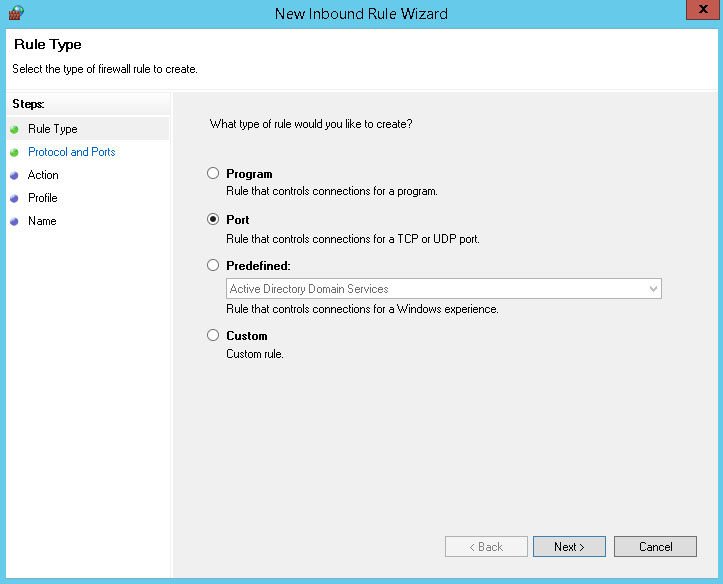
First we'll set up the rules for specific ports. In the New Inbound Rule Wizard, click the Port radio button. Click Next.
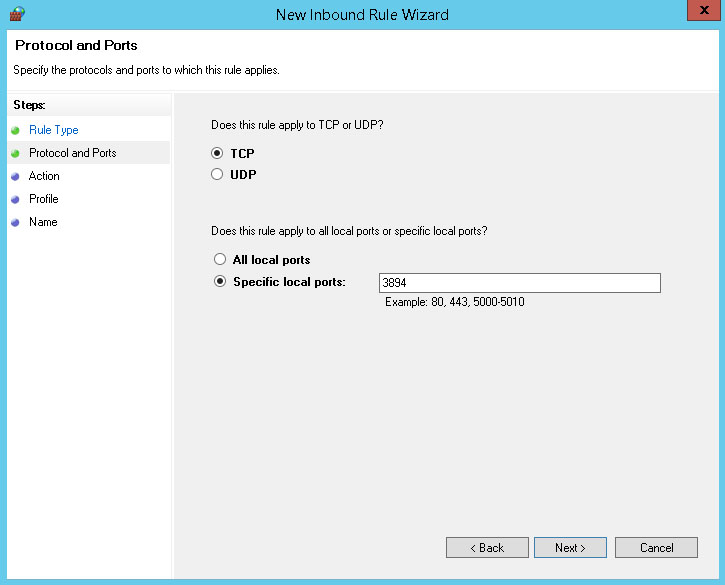
Set the rule to apply to TCP and specific port 3894. Click Next.
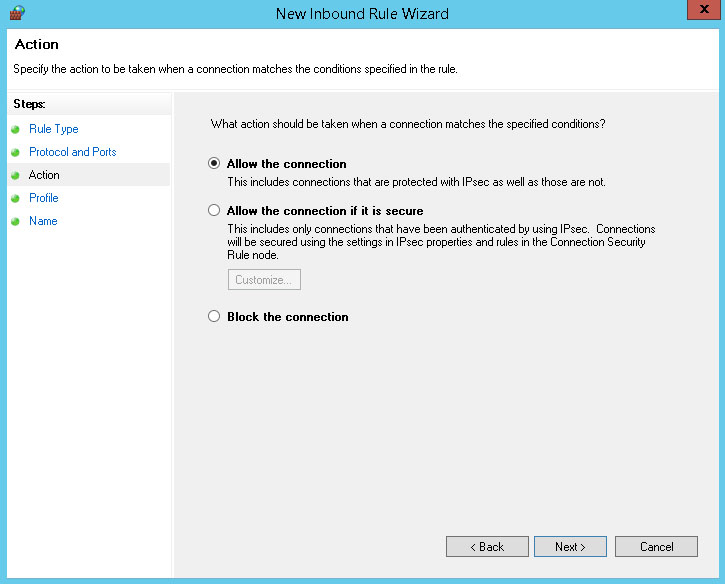
Set the Action to Allow the connection. Click Next.
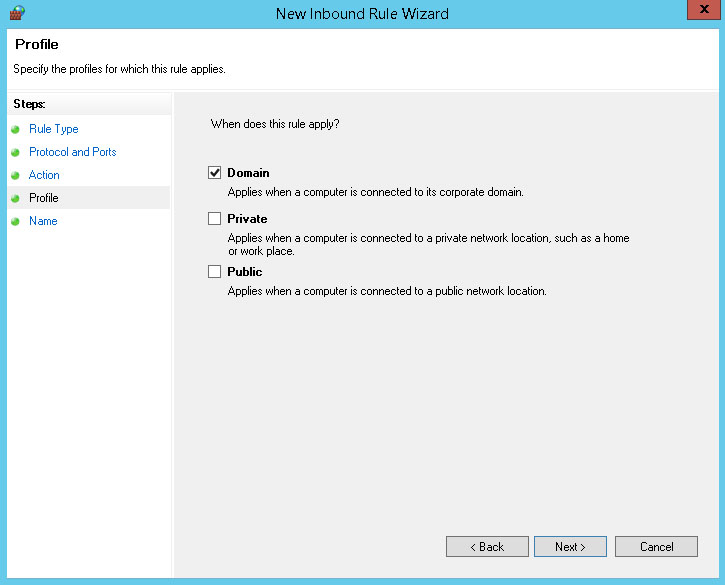
You may restrict the scope of the rule. In our example we'll uncheck the Private and Public networks to make the rule apply only when the computer is connected to the domain. When finished, click Next.
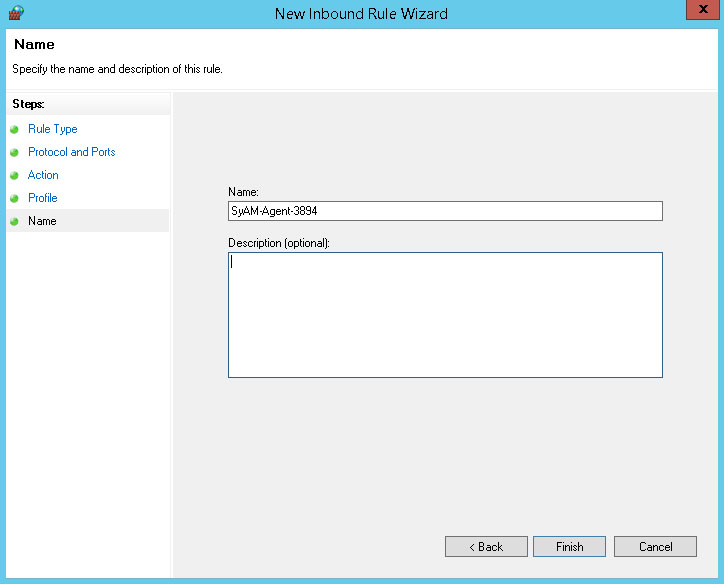
Enter a name for the inbound rule. We'll call it SyAM-Agent-3894. Click Finish.
Create another rule for the same port, but specifying the UDP protocol. The same name can be used for the TCP and UDP rules.
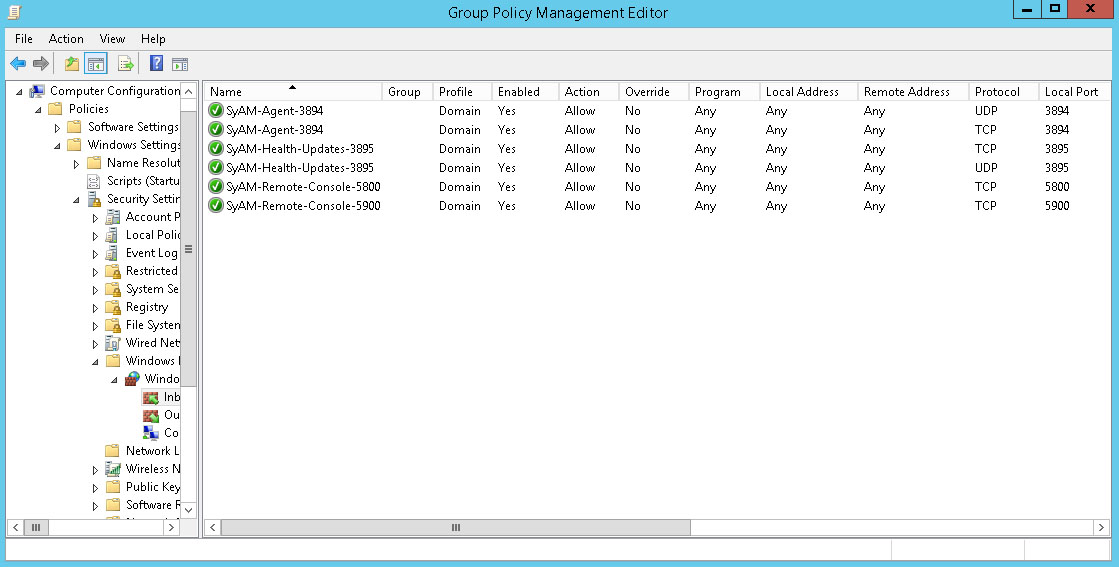
Create rules for other ports in the same way. A total of six rules for specific ports will be created:
- NAME: SyAM-Agent-3894, PORT: 3894, PROTOCOL: TCP
- NAME: SyAM-Agent-3894, PORT: 3894, PROTOCOL: UDP
- NAME: SyAM-Health-Updates-3895, PORT: 3895, PROTOCOL: TCP
- NAME: SyAM-Health-Updates-3895, PORT: 3895, PROTOCOL: UDP
- NAME: SyAM-Remote-Console-5800, PORT: 5800, PROTOCOL: TCP
- NAME: SyAM-Remote-Console-5900, PORT: 5900, PROTOCOL: TCP
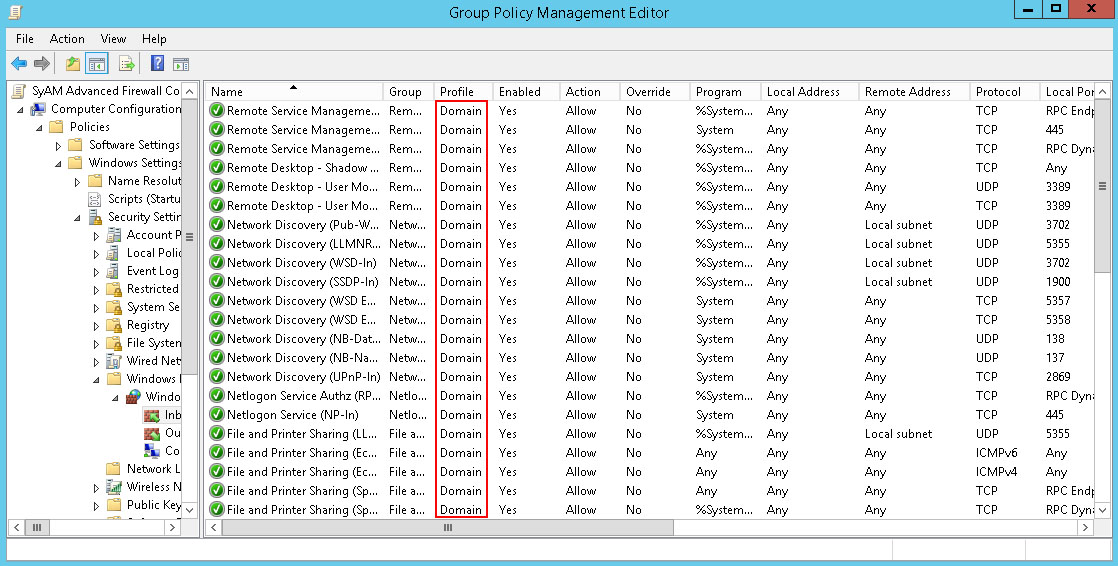
You can review the rules in Group Policy Management Editor to verify that everything is correct.
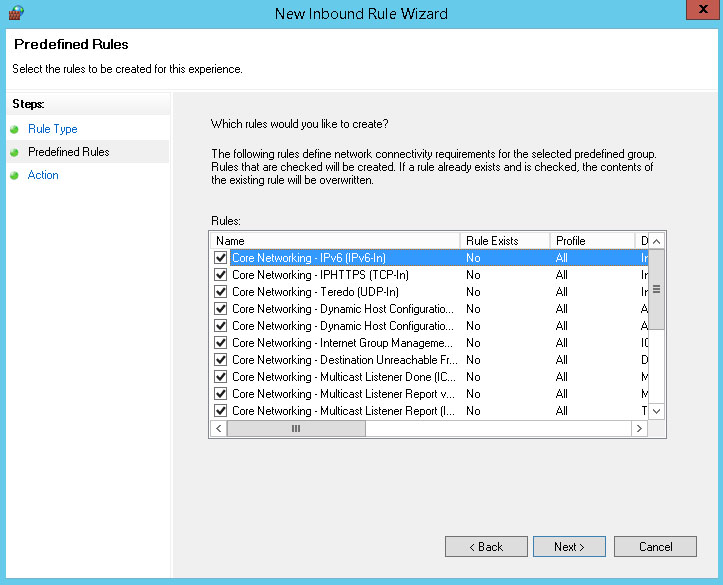
Now we can create the predefined rules. Right-click Inbound Rules and choose New Rule. In the New Inbound Rule Wizard, click the Predefined radio button. From the drop down menu, choose Core Networking. Click Next.
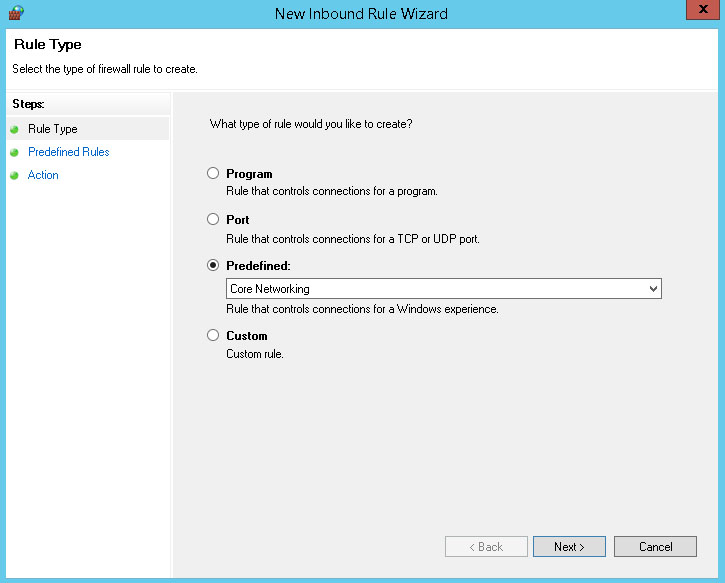
The wizard displays the rules defined by the Core Networking rule group. Leave all rules selected. Click Next.
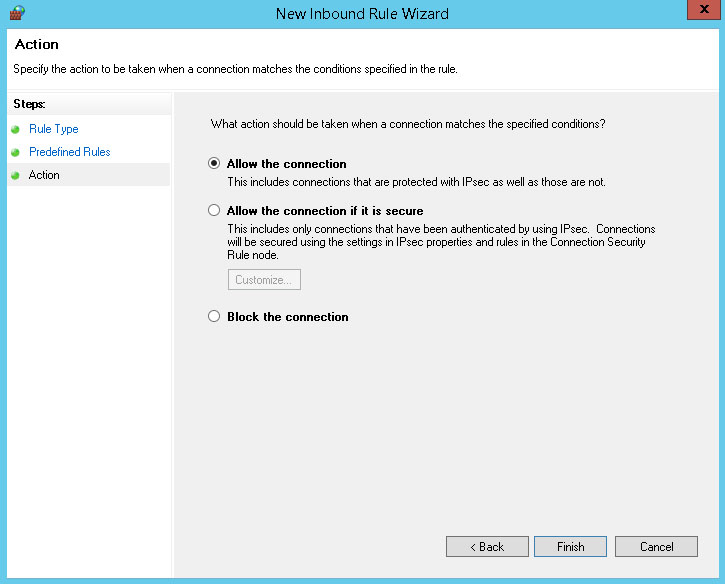
Set the Action to Allow the connection. Click Finish.
Create the other predefined rules in the same way, for a total of six groups:
- Core Networking
- File and Printer Sharing
- Netlogon Service
- Network Discovery
- Remote Desktop
- Remote Service Management (on Server 2008 this is called Remote Administration)
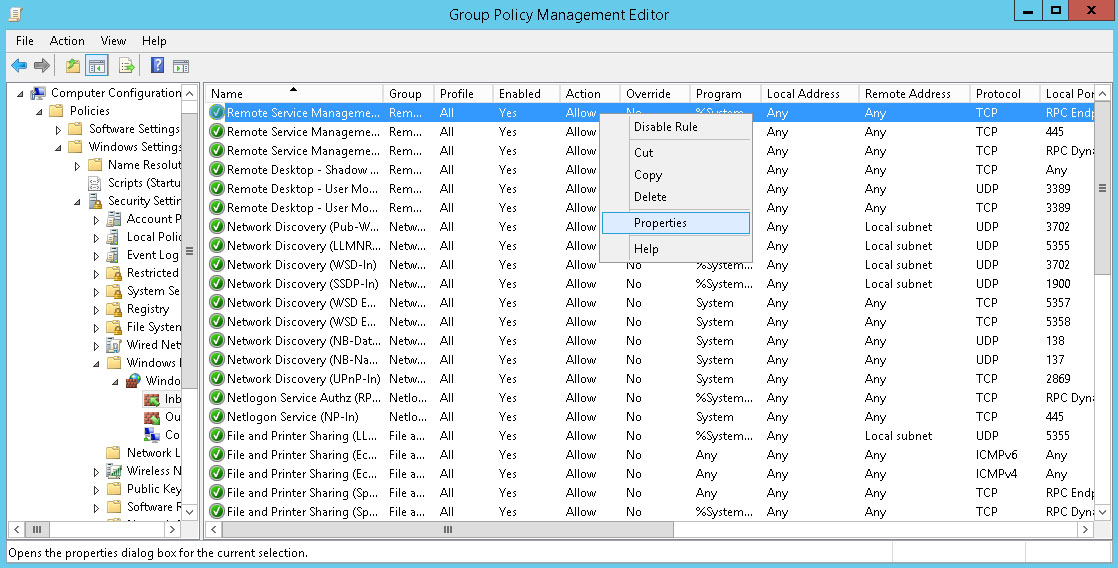
As we did with the rules for individual ports, the predefined rules can be restricted in scope, but this must be done for each individual rule in a group. Right-click a rule and choose Properties.
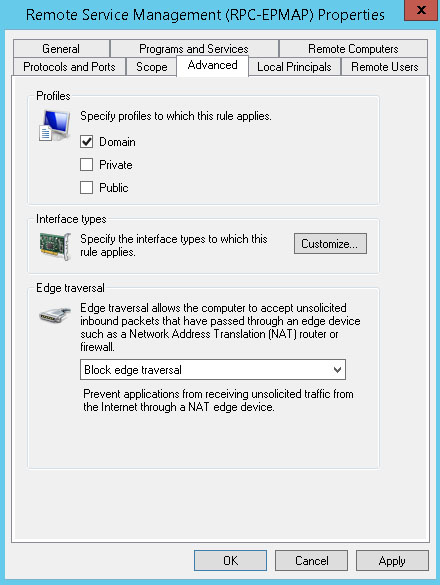
Click the Advanced tab. We'll deselect Private and Public profiles, leaving only Domain enabled. Click OK.
Repeat for each rule to be modified. You can then review the rules in the Group Policy Management Editor.
Close the Group Policy Management Editor.
Create Group Policy to configure exceptions for Windows Firewall (XP / Server 2003)
From the Start menu, go to Administrative Tools – Group Policy Management. In the menu under Domains, find the domain to be configured. Under the domain name, right-click Group Policy Objects. From the menu, select New.
Enter a name for the new Group Policy. Click OK.
Right-click the new policy and choose Edit from the menu.
In the Group Policy Management Editor, navigate to Computer Configuration – Policies – Administrative Templates – Network – Network Connections – Windows Firewall – Domain Profile.

Four items need to be configured:
- Allow inbound file and printer sharing exception
- Allow inbound remote administration exception
- Allow inbound Remote Desktop exceptions
- Allow inbound UPnP framework exceptions
For each item, double-click to display the edit window.
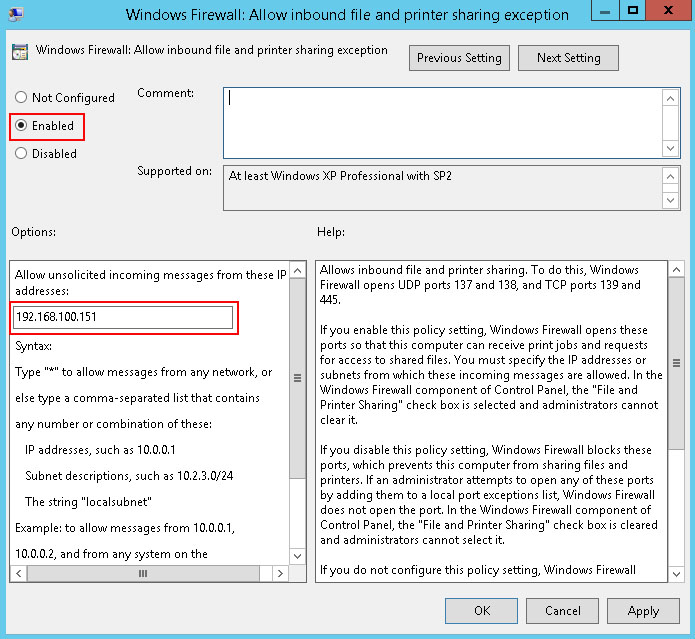
Click the radio button to change the exception status to Enabled. In the IP address field you can enter the address of the Management Utilities server (most restrictive option) or an asterisk to allow traffic from any IP address (least restrictive option). Click OK when finished, and edit the other exceptions in the same way.

Close the Group Policy Management Editor.
Create Group Policy to disable Windows Firewall with Advanced Security (Vista / Server 2008 or later)
From the Start menu, go to Administrative Tools – Group Policy Management. In the menu under Domains, find the domain to be configured. Under the domain name, right-click Group Policy Objects. From the menu, select New.
Enter a name for the new Group Policy. Click OK.
Right-click the new policy and choose Edit from the menu.
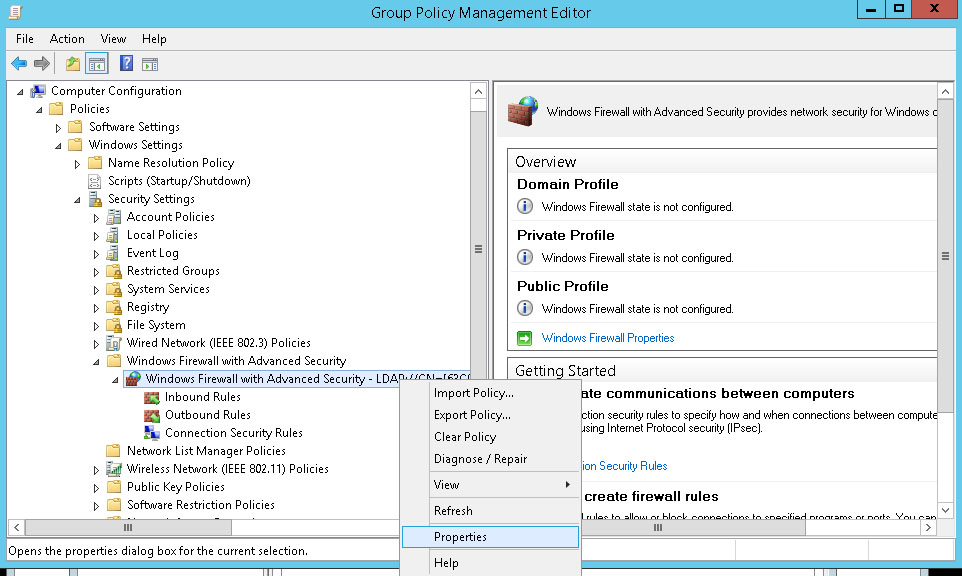
In the Group Policy Management Editor, navigate to Computer Configuration - Policies - Windows Settings - Security Settings - Windows Firewall with Advanced Security, then select Windows Firewall with Advanced Security - LDAP://cn=.
Right-click Windows Firewall with Advanced Security – LDAP://cn=… and choose Properties.
On the Domain Profile tab, use the drop down menu to set Firewall state to Off.
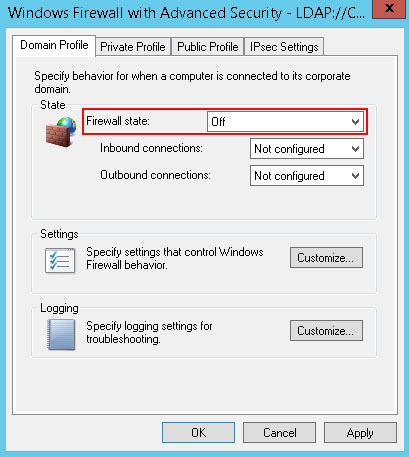
If you would like to disable the firewall on the Private Profile and/or Public Profile, perform the same action on the corresponding tabs. Click OK when finished. Close Group Policy Management Editor.
Create Group Policy to disable Windows Firewall (XP / Server 2003)
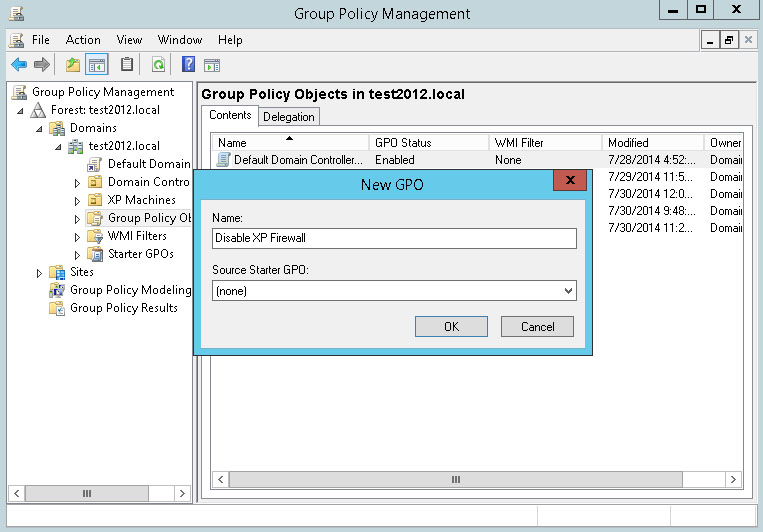
From the Start menu, go to Administrative Tools – Group Policy Management. In the menu under Domains, find the domain to be configured. Under the domain name, right-click Group Policy Objects. From the menu, select New.
Enter a name for the new Group Policy. Click OK.
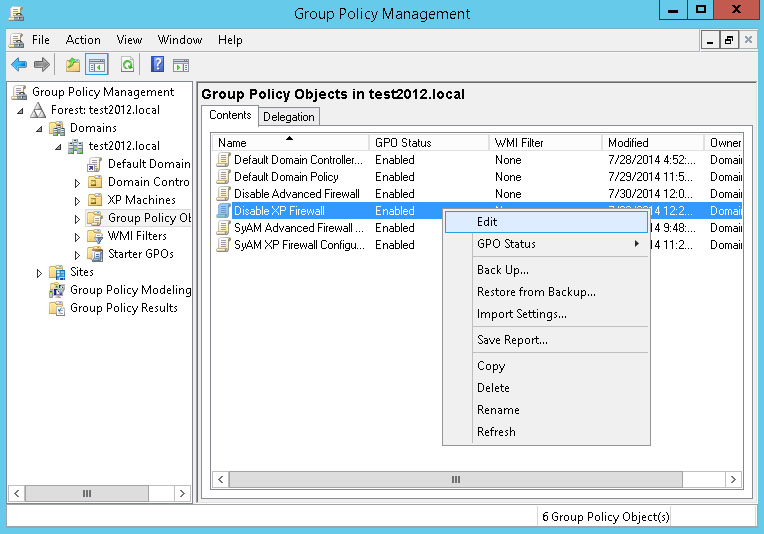
Right-click the new policy and choose Edit from the menu.
In the Group Policy Management Editor, navigate to Computer Configuration - Policies – Administrative Templates – Network – Network Connections – Windows Firewall – Domain Profile.
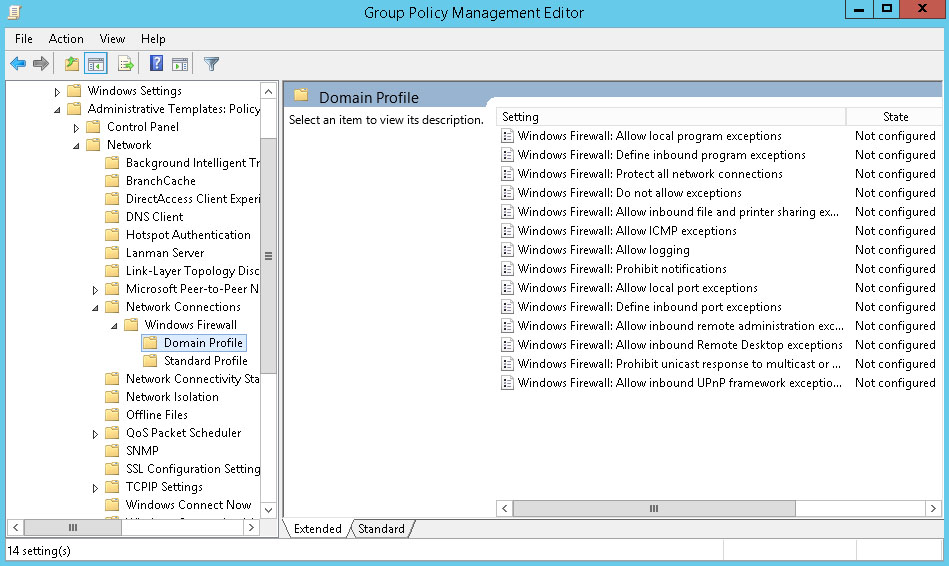
Find the setting Windows Firewall: Protect all network connections. Right-click the setting and choose Edit.
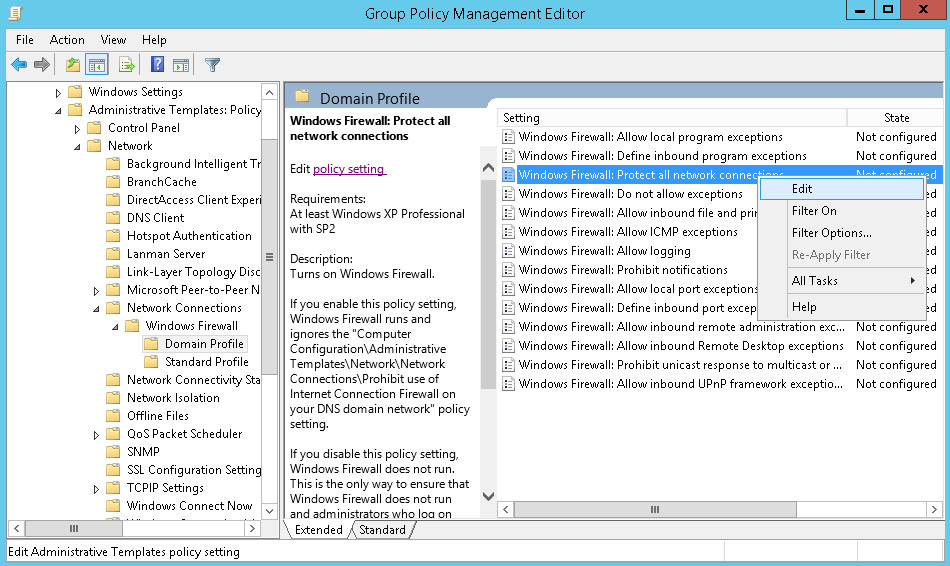
Click the Disabled radio button. Click OK.
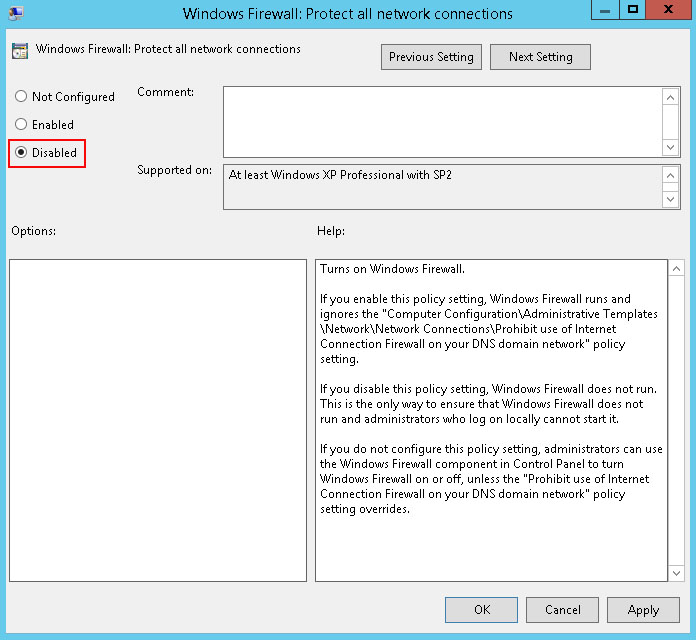
This will disable Windows Firewall for the domain profile. Repeat for Standard Profile if desired.
Close the Group Policy Management Editor.
Link Group Policies
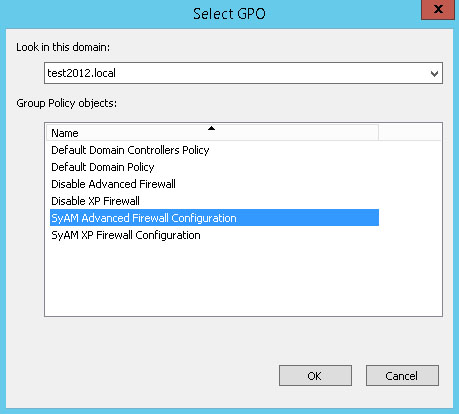
In the Group Policy Management console, we can link a Group Policy to a domain or Organizational Unit. To link a policy to the entire domain, in the Group Policy Management interface, select the domain, right-click, and choose Link an Existing GPO.
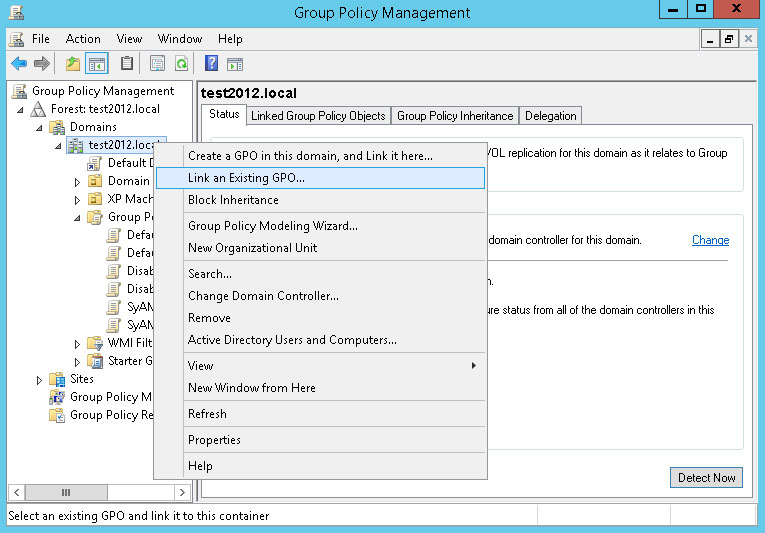
Select the Group Policy Object. Click OK.
A Group Policy can be applied to an Organizational Unit in the same way.
Allow enough time for the policy update to propagate to client systems. By default this will be between 60 and 120 minutes. Once the target machines have the updated firewall settings, you can proceed with network discovery and deployment of SyAM System Client.