Add / Remove Systems
Adding Systems to the Management Tree
Systems must be added to the Management Tree before they can be managed centrally through the System Area Manager.
You can only add systems that are running the SyAM System Client, and may only add those systems up to the limit set by your license key.
Once a system is added it will automatically unlock the System Client software running on that system, which will now send event messages to the System Area Manager software.
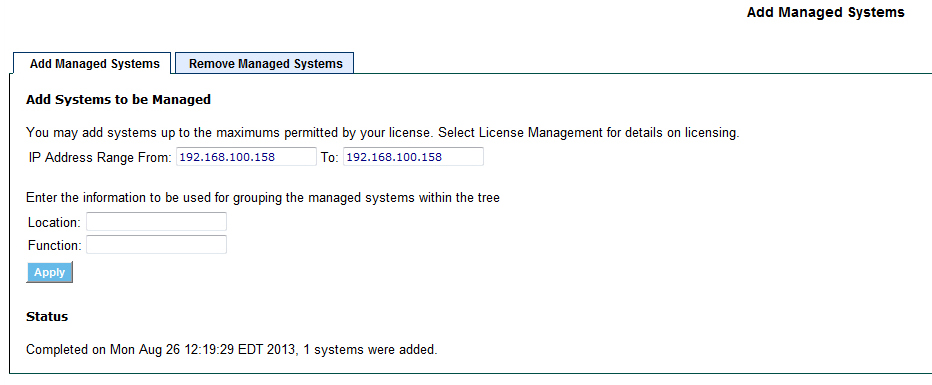
To add a system or discover systems to be added to the System Area Manager, choose Add Managed Systems from the drop down menu on the header bar.
- Enter the IP addresses in the From and To fields. To add a single system, enter the same IP address in the From and To fields. To discover systems across a network address range, enter the lower IP address in the From field and the higher IP address in the To field.
It is recommended to keep the IP address range “dense”. The longest wait times occur when trying to sample IP addresses that are not in use.
- Enter the Location and Function that is to be applied to the discovered systems. (These values are used in grouping and sorting of the tree.)
- Click the Apply button.
- You will now see a status of the addition scan saying how many systems have been scanned out of the total to be scanned.
- You can cancel the scanning by pressing the Cancel button.
- Once discovery has been completed the Status will show the number of systems successfully added.
- Changing to which System Area Manager the system reports
Remove the system from the first System Area Manager tree to stop the system from reporting. Once this is done, add the system to the second System Area Manager tree by following the instructions “Add Managed System”
- Removing Managed Systems
If you wish to remove a single managed system from the System Area Manager Tree:
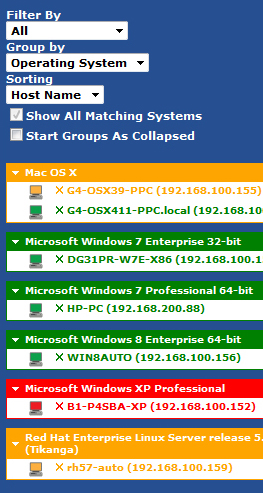
- Click on the <X> next to the name of the system
- You will be prompted to confirm the deletion of this system
If you wish to remove a group of systems choose the Add Managed Systems option from the drop down menu, then click the Remove Managed Systems tab.
Here you can choose to remove systems by an IP Address range, Function, or Location. You can also remove inactive systems based on how long they’ve been inactive.
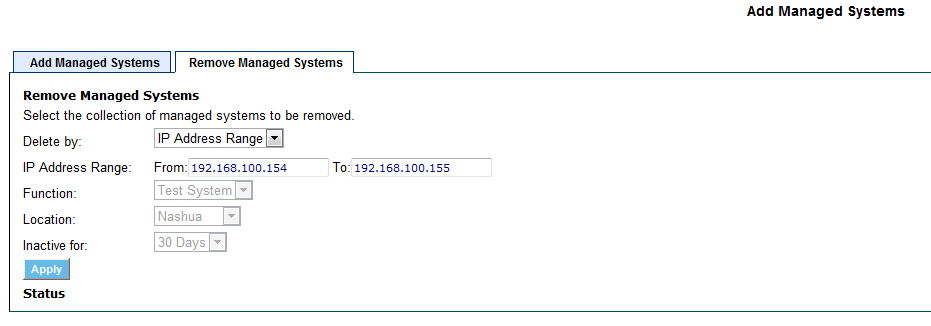
If you choose to remove by IP Address Range, enter starting and ending IP addresses. All systems running the System Client within that range will be removed from being managed by the System Area Manager.
If you choose to remove by Function then you must choose one of your predefined functions. All systems running the System Client within the chosen Function will be removed from being managed by the System Area Manager
If you choose to remove by Location then you must choose one of your predefined locations. All systems running the System Client within the chosen Location will be removed from being managed by the System Area Manager
If you choose to remove by Date then you must choose the number of days the System Client has been inactive for. All systems running the System Client that have been inactive and not reported to the System Area Manager within the chosen option of 30, 60 or 90 days will be removed from being managed by the System Area Manager
When the removal process has completed, the number of systems that were successfully removed from the System Area Manager will be displayed.
Once a system has been removed from the Management Tree the System Client software will go back to email alerting only and will not report its events to the System Area Manager.
The system you removed is still being monitored for health by the management agent on that system, which will alert via email to any issues it discovers. You may add the system back into the System Area Manager tree at any time.
If you wish to completely disable this monitoring on the removed system, uninstall the software on that system.