Deploying Adobe Acrobat Reader
Deploying Adobe Acrobat Reader 19
Adobe Customization Wizard can be used to install Adobe Acrobat or Reader with a variety of installation options. The customized installation can then be deployed using Management Utilities. In this example, we’ll do a silent installation of Adobe Reader with automatic updating disabled.
To obtain the Reader installation that supports enterprise deployment, you will need to contact Adobe and obtain a valid Distribution Agreement
Requirements: Download the Customization Wizard and Reader installation executable files from Adobe. The version of Customization Wizard must be the SAME major release as the Reader version, so for our example a search for Adobe Customization Wizard XI will locate the download page on Adobe’s website.
Install Adobe Customization Wizard with default settings on the server running the SyAM Management Utilities.

Place the Adobe Reader installation executable in the directory defined as the Default Application Path.
Example \\191.168.200.36\apps\adobe-reader\
Open a command prompt and change to this directory. The following command will start the Adobe Reader installation which will extract the files to the specified directory. It is best to use a subdirectory that does not already exist, and to specify the full path. Once the files have been extracted, the installation will terminate without taking any further action.
C:\APPS\Adobe-Reader>AcroRdrDC1901020099_en_US.exe -nos_o"c:\apps\readerdc" -nos_ne
In our example, C:\apps is the default application directory, and Readerdc is the newly created subdirectory. Change the directory name as appropriate. Please note that there is no space after the nos_o parameter.
The installation will create the directory that contains the files used by the Customization Wizard, in particular AcroRead.msi and setup.ini.
From the Start Menu, run Adobe Customization Wizard.
Go to the File menu and select Open Package. Navigate to the directory created in the last step, c:\apps\readerdc and select AcroRead.msi.
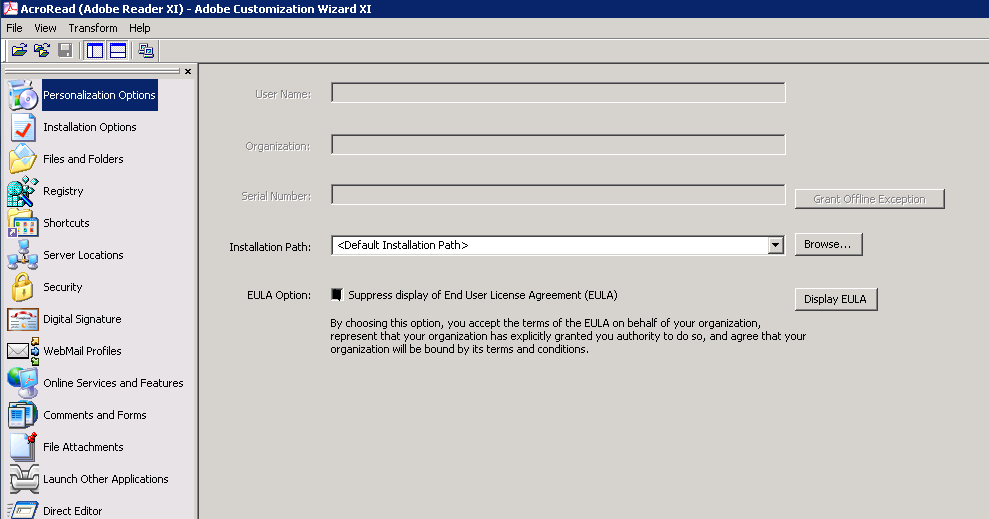
Use the menu in the left pane of the Customization Wizard to navigate through the options provided. Consult the Adobe documentation for detailed information. Some options we will choose in our example:
• EULA: Suppress display of End User License Agreement
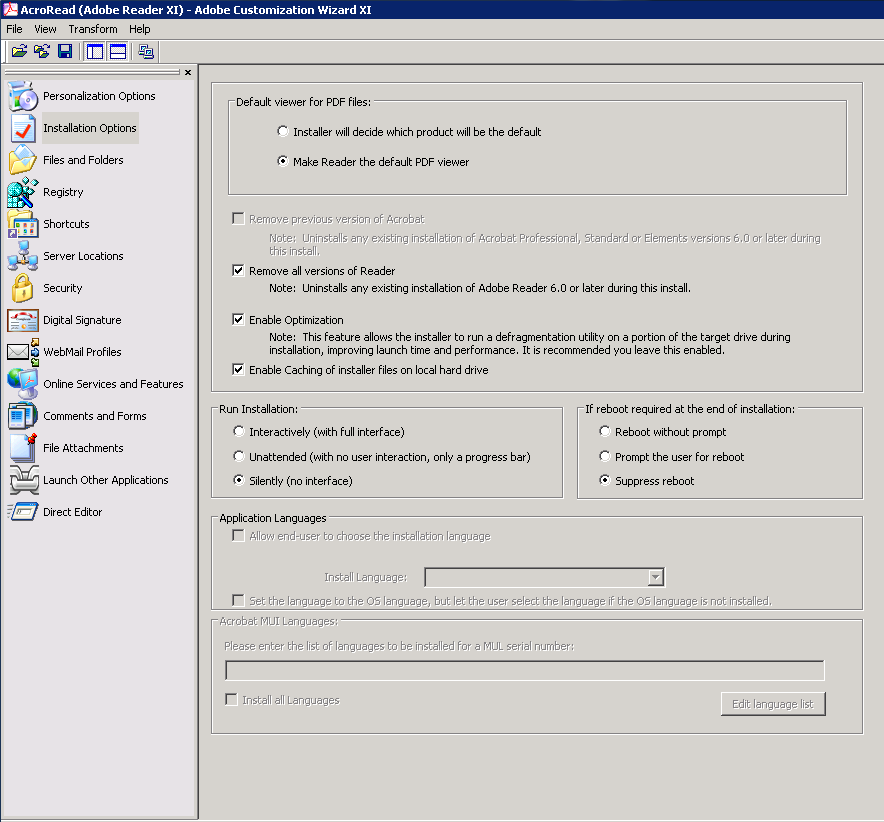
• Installation Options: Run Installation Silently (no interface) and Suppress reboot
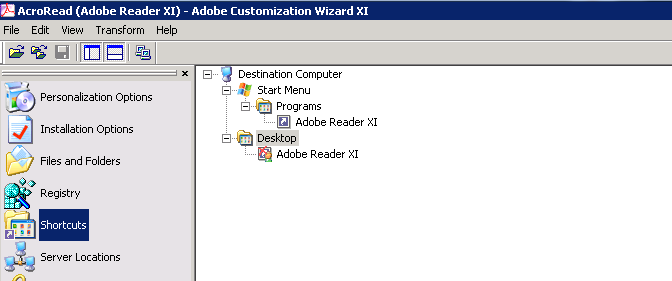
• Shortcuts: Desktop – Adobe Reader X (right-click on Adobe Reader under Desktop, then choose Remove. No desktop shortcut will be installed)
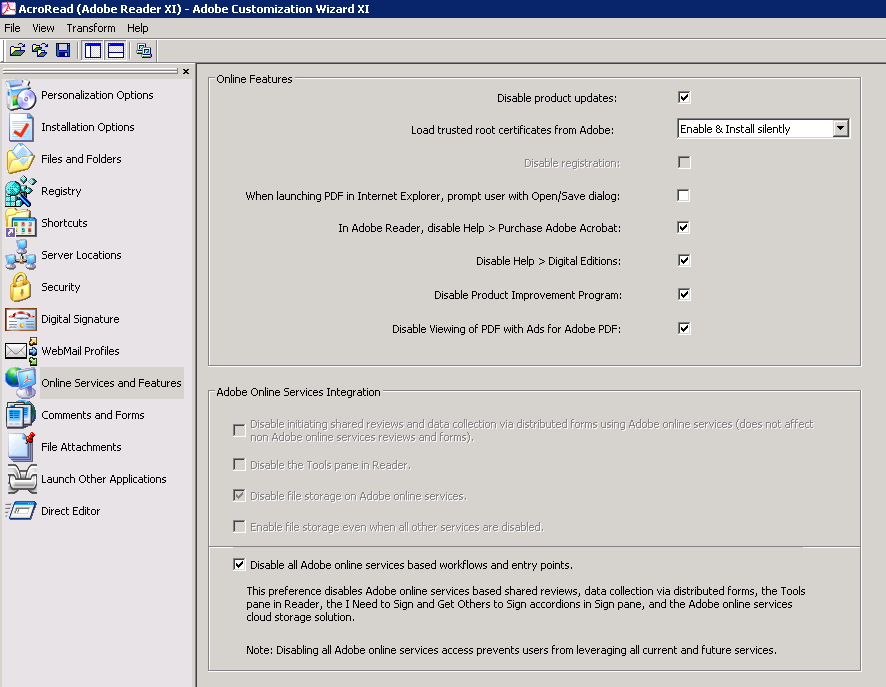
• Online and Acrobat.com Features: Disable all updates, set Load trusted root certificates to Disable
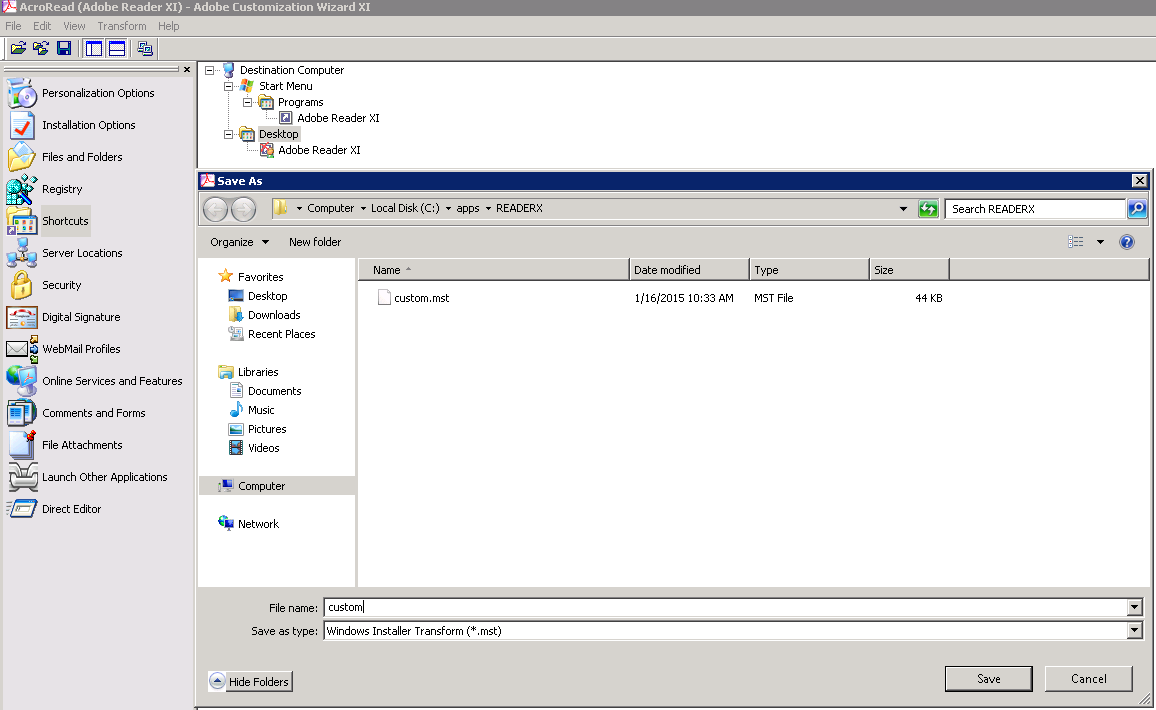
When you are finished selecting options, go to the Transform menu and select Generate Transform. Choose a file name (in our example we’ll use custom.mst) and save the file to the directory where AcroRead.msi is located (in our example, the ReaderX directory.)
Exit the Adobe Customization Wizard. Do NOT save changes to AcroRead.msi.
Now, create a small Windows batch file that will run the installation.
@ECHO OFF
mkdir c:\tmps
xcopy \\192.168.200.36\apps\READERdc\*.* /s c:\tmps\*.* /c/y/i
msiexec /i c:\tmps\AcroRead.msi PATCH=c:\tmps\AcroRdrDCUpd1901020099.msp TRANSFORMS=c:\tmps\custom.mst /qn
RD /Q /S c:\tmps
exit
Some Adobe Reader installations are produced by adding a patch file (with .msp extension) to an older version. The PATCH parameter should be omitted if no such file is present in the directory where AcroRead.msi is located. Substitute the name of the patch file found in that directory. Our example is AcroRdrDCUpd1901020099.msp - Windows installer patch file would be put in place of the PATCH value in the example given.
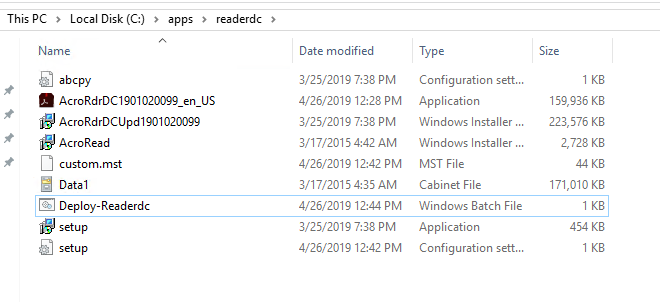
Save the batch file (we’ll name our file Deploy-Readerdc.bat) and copy it to the network share specified by the Default Application Path.
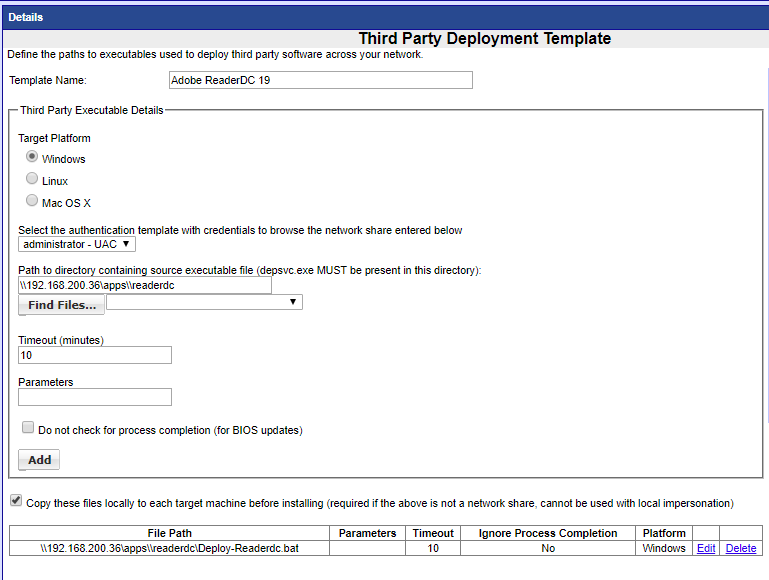
Create the Third Party Template