Importing New Assets
Importing New Assets into the Asset Database
SyAM's asset management system enables users to import asset data directly into the database from a CSV file. This feature enables organizations to efficiently populate all their assets and have centralized access and reporting on them.
Creating the File to be Imported
Import assets directly from a CSV file for efficiency. Export a single asset to obtain a CSV template file with field names in the first row, eliminating the need to map column headers to the asset database fields.
When importing assets, ensure that the asset name column does not contain duplicates or empty rows.
To obtain the asset import file template, filter your asset results to one or a few assets. Then, access the Asset Dashboard and click on the Download File icon. ![]()
Open the downloaded CSV file in Excel.

Delete all rows with the data so you are just left with Row 1 that contains the field names.
Delete any columns in the CSV file that are not going to be used for importing the data. Only retain the column headings that contain the fields being updated.
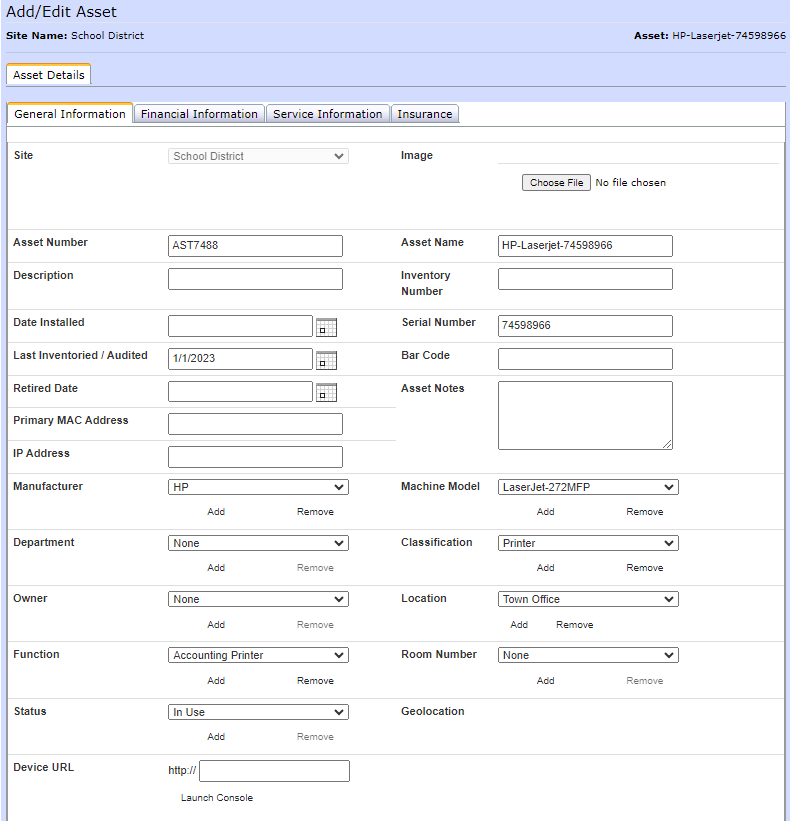
Enter or paste the data of the assets you wish to add into the corresponding columns. For new assets, it is recommended to populate the following fields.
Asset Name
Asset Number (If used in your organization)
Location (Case sensitive)
Function
Serial Number
Classification (Used for ticket assignment)
Status (The default used for active assets is “In Use”)
Last Inventoried / Audited (Format is 6/15/2023 7:42:12 PM)
Manufacturer
Machine Model
After entering your data in the CSV file, check for duplicate Asset Names and ensure that there are no duplicates. Additionally, review the Asset Number and Serial Number columns for any duplicates.
![]()
Another check to perform on your file is to ensure that there are no empty rows or columns at the end. In Excel, remove several rows below the last filled row and remove several columns after the last filled column. Alternatively, you can open the CSV file in Notepad and check the end of the file to ensure there are no excessive commas representing empty fields.It is recommended to import a file with only a few assets initially to verify that the data is being populated correctly.
**PLEASE NOTE** Importing blank values will not remove existing values in the asset database. If a field in the CSV file is left blank during import, it will not overwrite or remove any existing values for that field in the asset database.
Importing the Asset CSV File
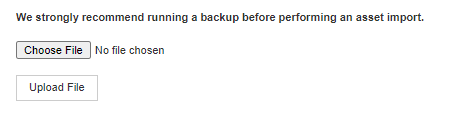
Access the Asset Dashboard and click on the Upload File icon. ![]()
Click on "Choose file" and select the CSV file that you want to import.
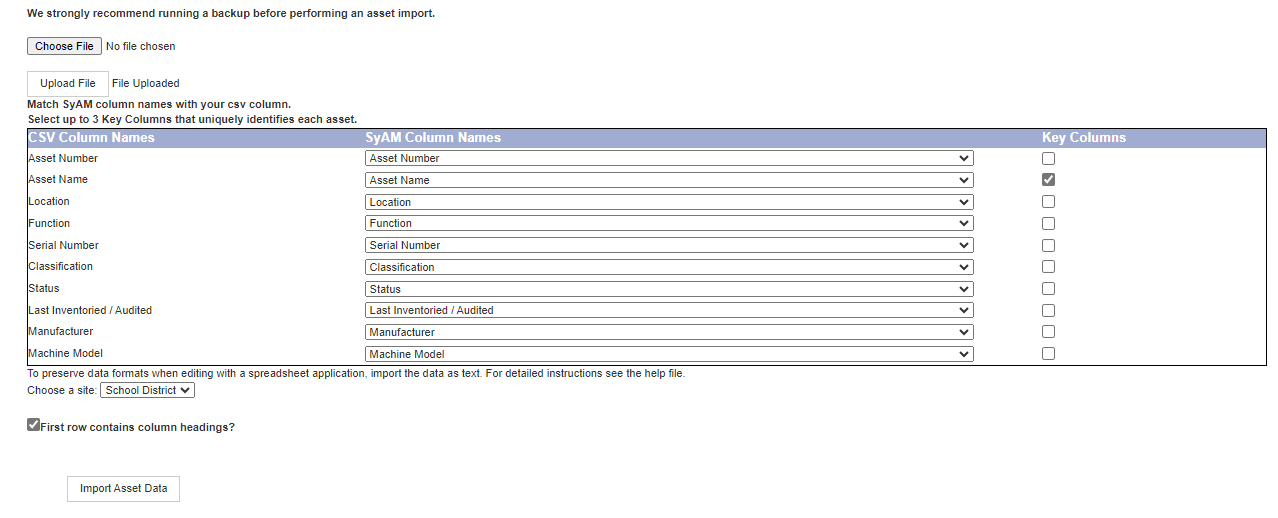
After selecting the file, click on "Upload File". This will open the Column Mapping table.
If you used the Asset file template, all mapping will be in place. If you used your own column headings, you will need to select the relevant asset field to be mapped to each column heading.
Select "Asset Name" as your key column, and then click on "Import Asset Data".
During the import process, the system will check if the Asset Name already exists. If it does, the existing asset will be updated with the fields from the CSV file. If the Asset Name does not exist, a new asset will be created, and the fields will be populated from the CSV file.
The time taken to import will vary based on the number of assets and columns being imported.
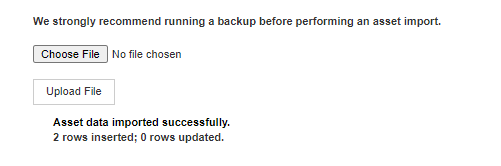
Once the import process is complete, you will be provided with information on the number of assets that were added and the number of assets that were updated.
Verify Imported Data
Confirm that the imported data is accurate and matches the expected values by reviewing the details of the imported assets.
From the Asset Dashboard, use the filters to navigate to the assets that were imported. In this case, since two new printers were imported, you can use the classification attribute to filter for assets classified as "printer."
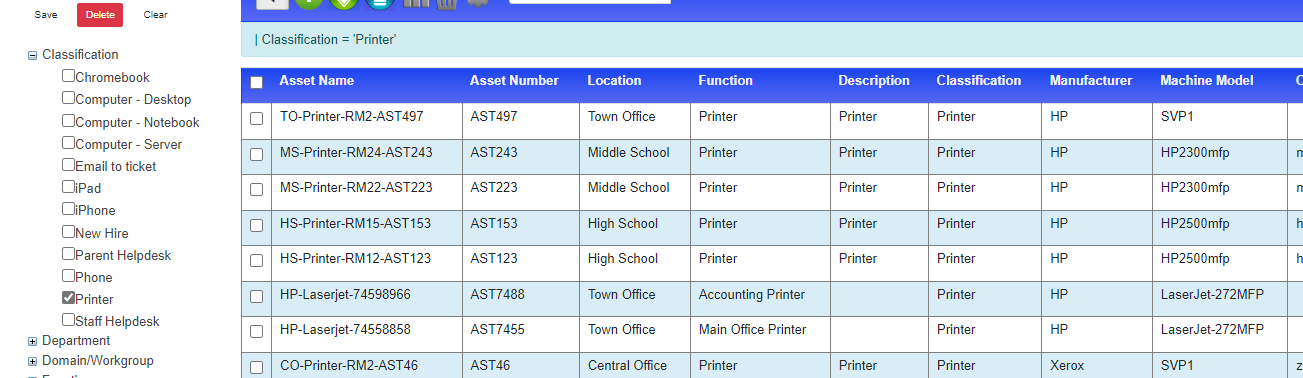
Click on one of the imported assets from the Asset Dashboard and view its details to confirm that the data is populated correctly in the respective
fields.
Troubleshooting
If your file fails to import, check for the following potential issues:
Check the file for duplicated Asset Names – use Excel

Check for empty rows in and at the end of the data being imported
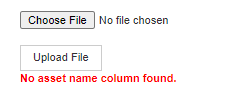
Check the Column headings, it must contain a column heading called “Asset Name”
Assets do not show in Asset Dashboard, check to see if you added the assets to a Location or Asset Classification that your user does not have access to.
Reviewing the Asset Import Log File – The import log file can be found under
C:\sitemanager\assetutility\assetimport.log
Reviewing the file used on the import – A copy of the csv file used on the last import can be found under C:\sitemanager\assetutility\assets.csv
The mapping of the column number to the asset field can be viewed under C:\sitemanager\assetutility\colmap.txt
By addressing these potential issues, you can troubleshoot and resolve any problems encountered during the import process.