DASH
The DASH standard allows secure remote and out-of-band systems management. The DASH tab will appear in the Remote Management interface if this feature is supported by the system hardware and System Client version.
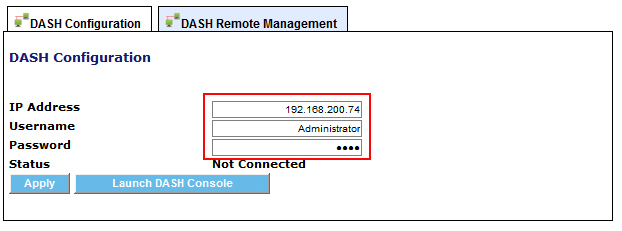
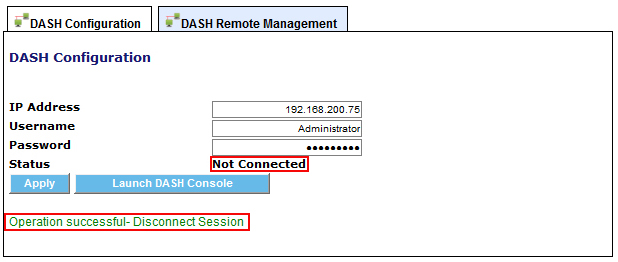
Clicking the DASH tab displays the DASH Configuration and DASH Remote Management tabs. In DASH Configuration, enter the DASH out of band authentication information as configured for the client, and click Apply to save your configuration. The IP Address box is automatically populated with the IP address used by the operating system. Some systems will require a different IP address for the DASH connection. If the OS is configured to use DHCP, and DASH is configured to use the same IP address, clear the IP Address field and press Apply so it will update using the current DHCP Address.
Click the Launch DASH Console button to open a new window and log in to the system’s embedded DASH management console.
DASH Remote Management
With DASH configured in System Area Manager, direct power control of supported systems is enabled.
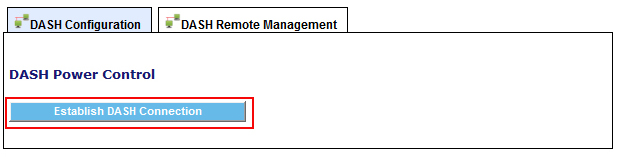
1. Click the DASH Remote Management tab, then click the Establish DASH Connection button.
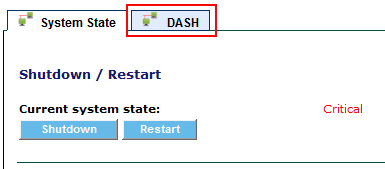
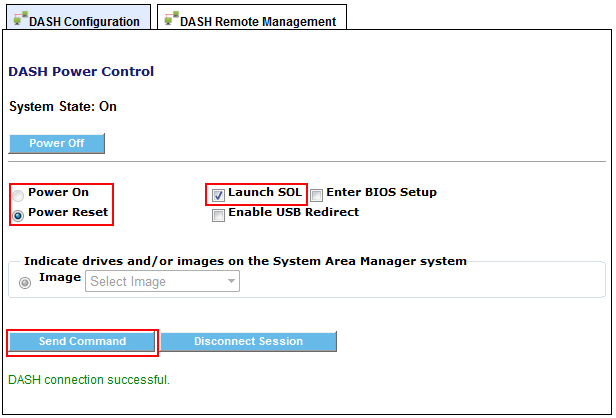
2. The current power state of the system will be displayed.
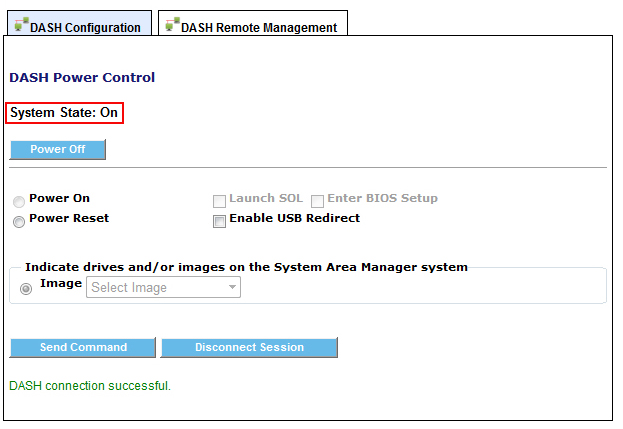
3. Choose a power option. If the system state is On, clicking the Power Off button will cause a shutdown. You can also click the Power On radio button (if the system state is Off) or the Power Reset button (if the system state is On), followed in either case by clicking the Send Command button. The result of the chosen power command will be displayed at the bottom of the screen.
![]()
4. When finished, you must disconnect the DASH session by clicking the DASH Configuration tab, then clicking the Disconnect Session button. Remote sessions will be left connected if they are not disabled.
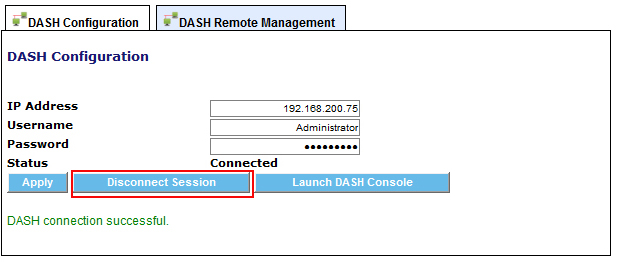
5. Once disconnected, the system status will update to Not Connected.
- DASH Serial Over LAN
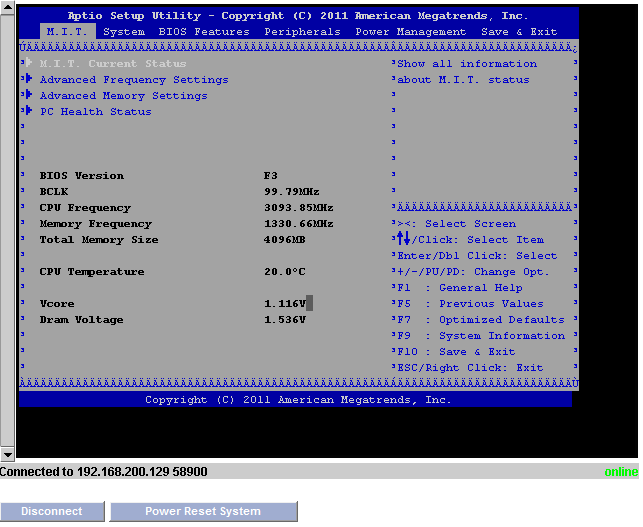
With Serial Over LAN you can access the system during its boot sequence, enabling you to access the system BIOS to make any needed changes.
Serial Over LAN is only available as the system powers on. The operating system GUI will not be displayed.
1. On the DASH Remote Management tab, establish a connection.
2. If the System State is Off, click the Power On radio button, or if the System State is On, click the Power Reset radio button. Check the box to Launch SOL. Click the Send Command button.
- The Serial Over LAN console will be displayed in your web browser. Click on the console and press the BIOS access key (for example, F2 or DEL) to enter the BIOS setup when the message comes up. Should you need to reboot, you can click the Power Reset System button.

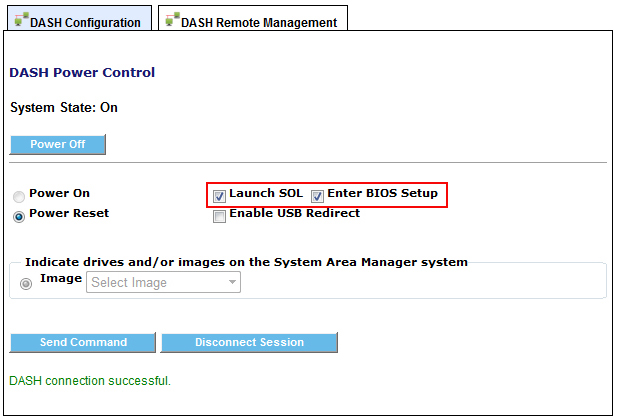
4. You can also go directly into BIOS configuration by checking the Enter BIOS Setup box when launching Serial Over LAN.
- DASH USB Redirection
With System Area Manager and the DASH configured managed system, you can redirect media from the Area Manager system to the client system by using the USB Redirect feature in the DASH Remote Management tab.
USB redirection is available as the system powers on. This allows you to boot from .IMG or .ISO bootable images.
In addition, USB redirection can be used when the system OS is running, and the image can be accessed as if it were physically connected to the client system.
To make image files available for USB redirection, place them in the following folder on the System Area Manager:
C:\SyAM\Jetty\syam\webapps\root\dashiso
1. On the DASH Remote Management tab, establish a connection.
2. Check the box to Enable USB Redirect.

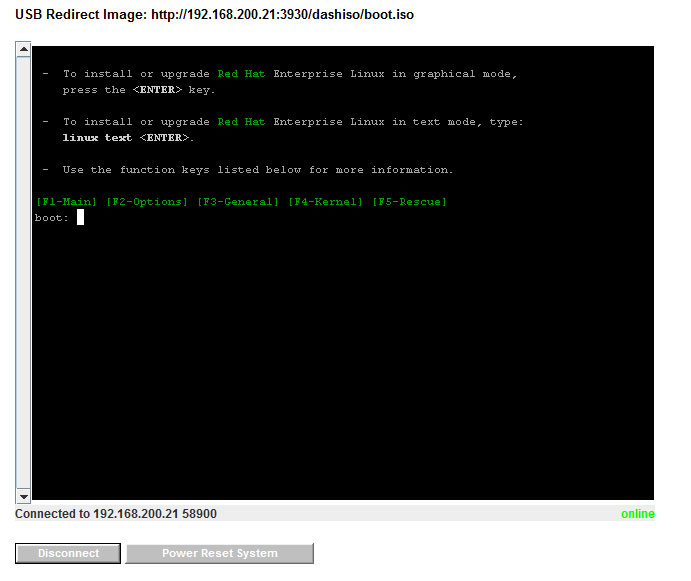
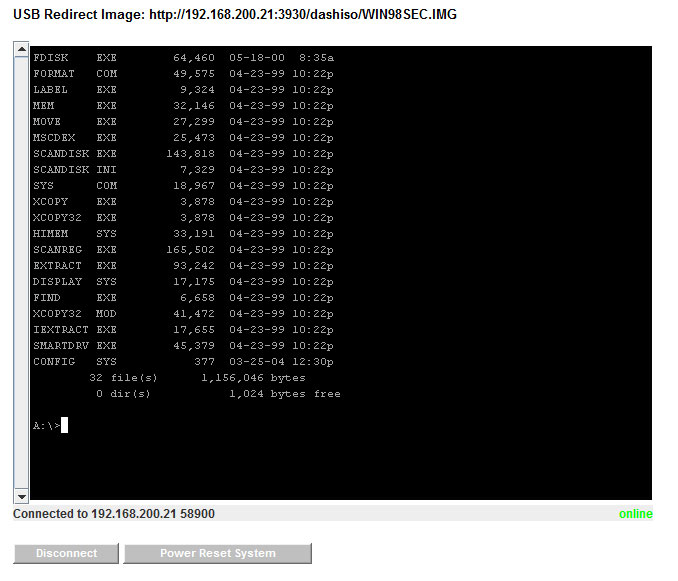
3. In the Image drop down menu, select the IMG or ISO image that will be redirected to the client system, then click the Send Command button. This will then redirect the image to the client system, where the files on that image can be accessed.
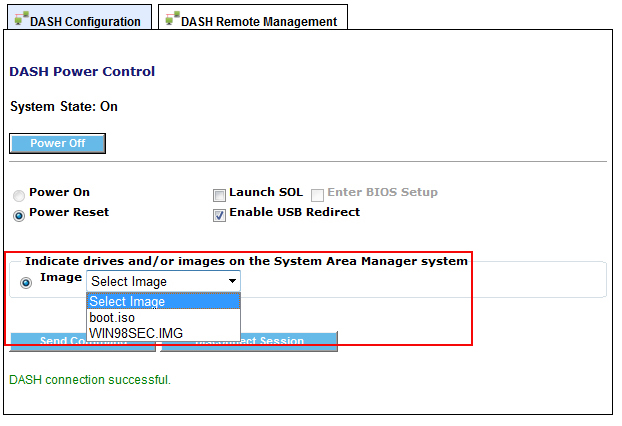
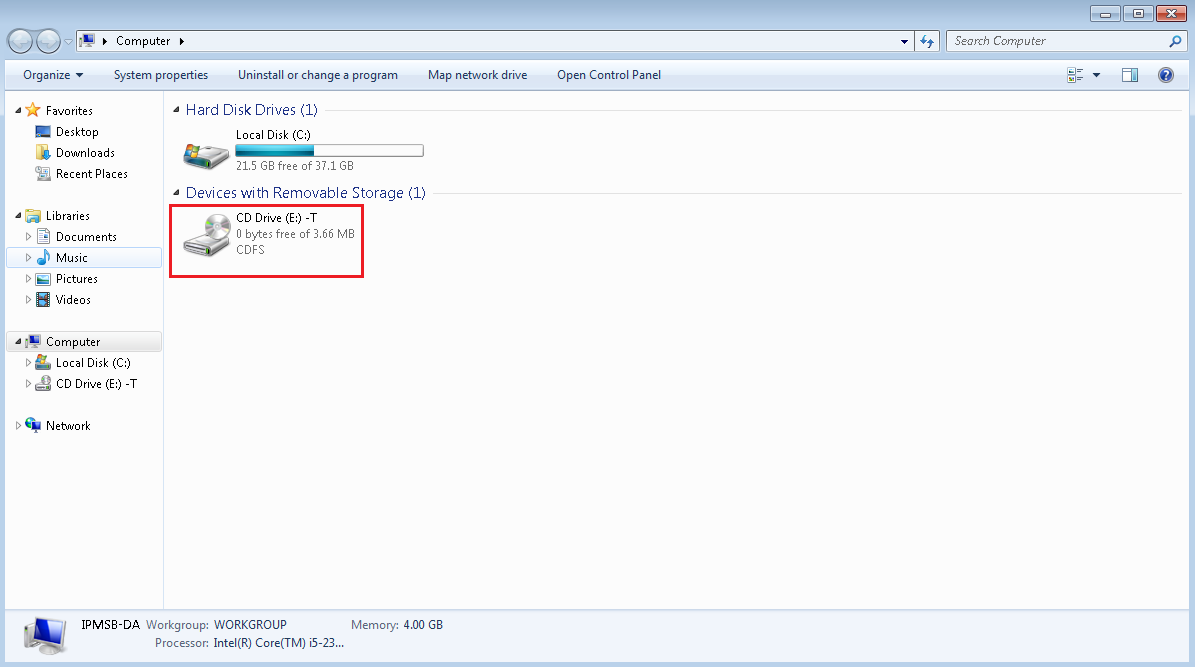
ISO images will appear as CD devices on the Windows client system.
IMG images will appear as floppy disks on the Windows client system.

USB redirection can be used with Serial Over LAN so that the user can see the boot sequence and can take control of the boot with the ISO or IMG image. The BIOS boot order must have the CD/DVD before the hard drive for USB redirection to ISO when booting the system.
1. On the DASH Remote Management tab, establish a connection.
2. Choose the Power On or the Power Reset radio button.
3. Check the Launch SOL and Enable USB Redirect checkboxes.
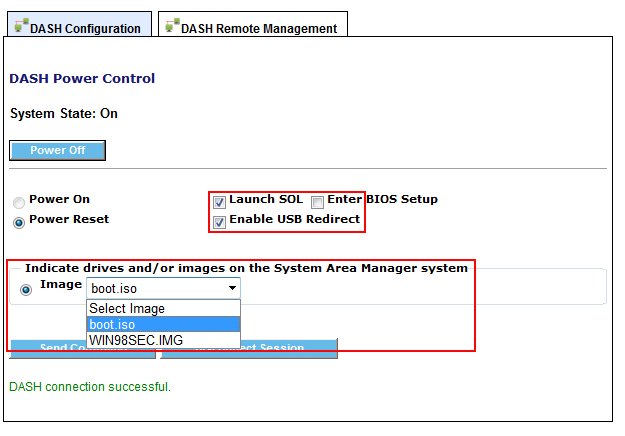
4. In the Image drop down menu, select the IMG or ISO image that will be redirected to the client system, then click the Send Command button. This will then redirect the image to the client system, which will boot from the image.